SQL Server Set Up
Deploying ERP Crystal SQL App on Server
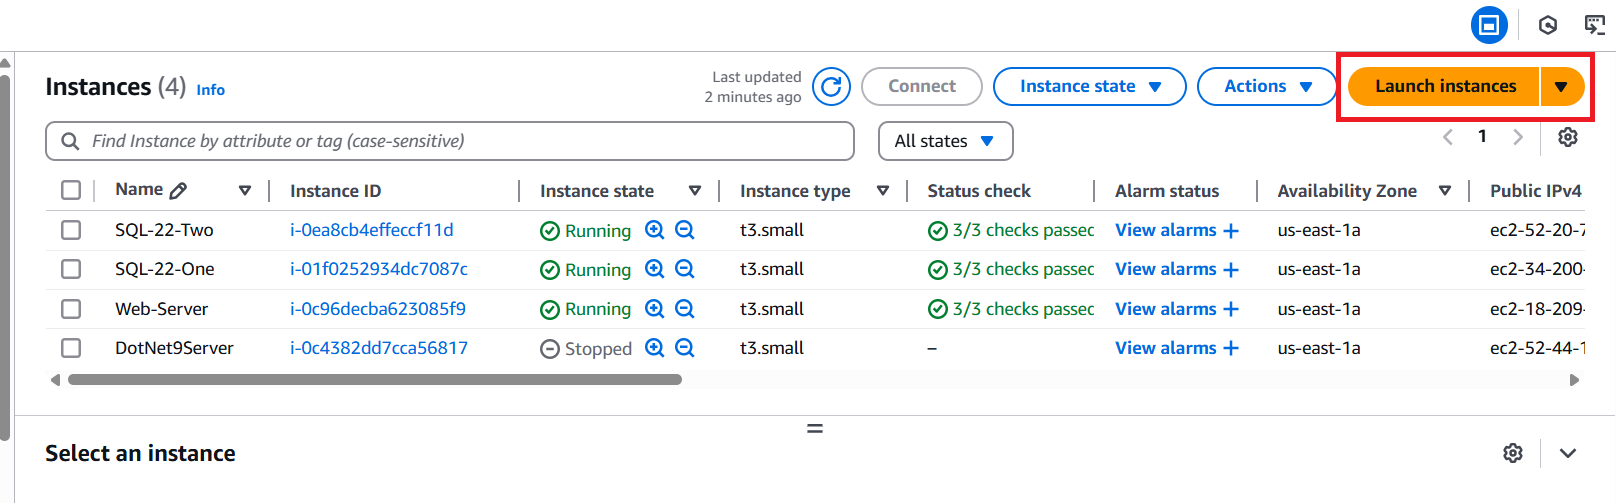
1. Set Up Server
a. Login to AWS Management Console
- Go to AWS Console and sign in.
- Navigate to EC2 Instances from the left panel.
b. Launch an EC2 Instance
Click Launch Instance.
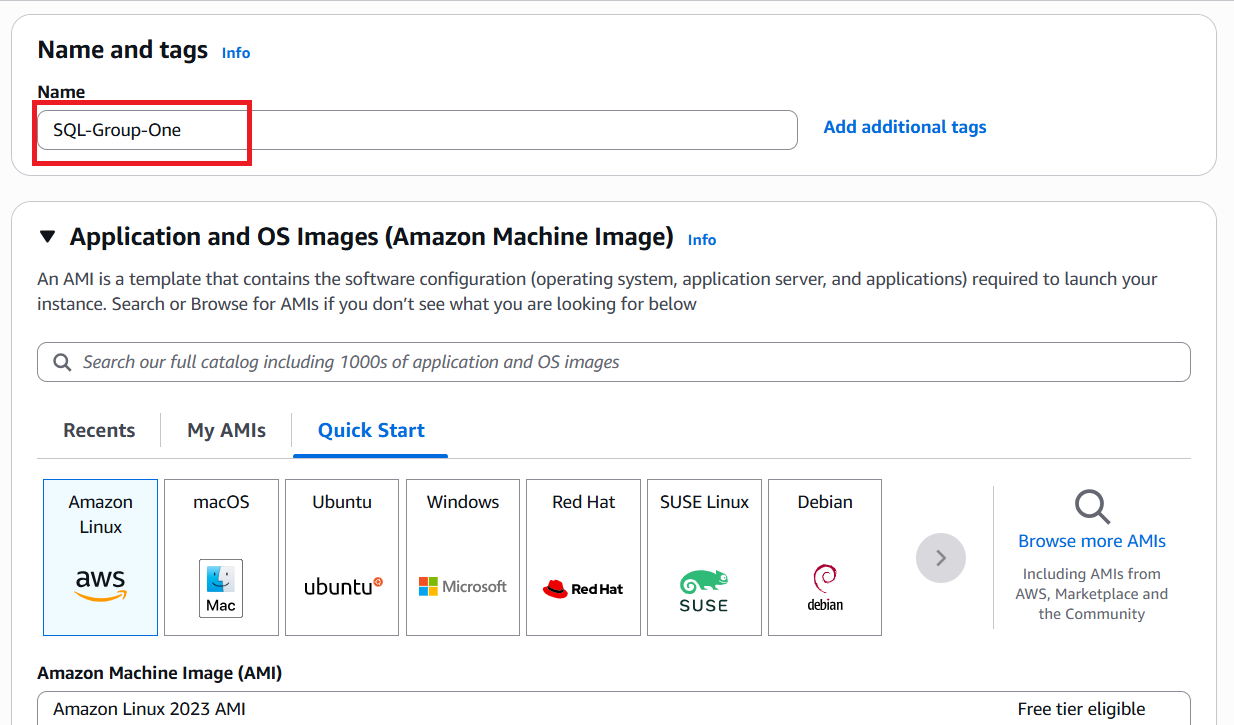
Provide a suitable server name (e.g. SQL-Group-One).
Choose Microsoft Windows Server 2022 Base from the Application and OS Images (Amazon Machine Image). (Avoid selecting core base).
Select Instance Type:
t2.small.Choose Key Pair:
AWS-One.
c. Configure Network Settings
- Enable Allow HTTPS and Allow HTTP traffic from the internet.

d. Configure Storage
- Set SSD Size:
45GB - Choose SSD Type:
gp3
e. Advanced Settings
- Stop-Hibernate Behavior: Select
Disable - Termination Protection: Select
Enable - Click Launch Instance
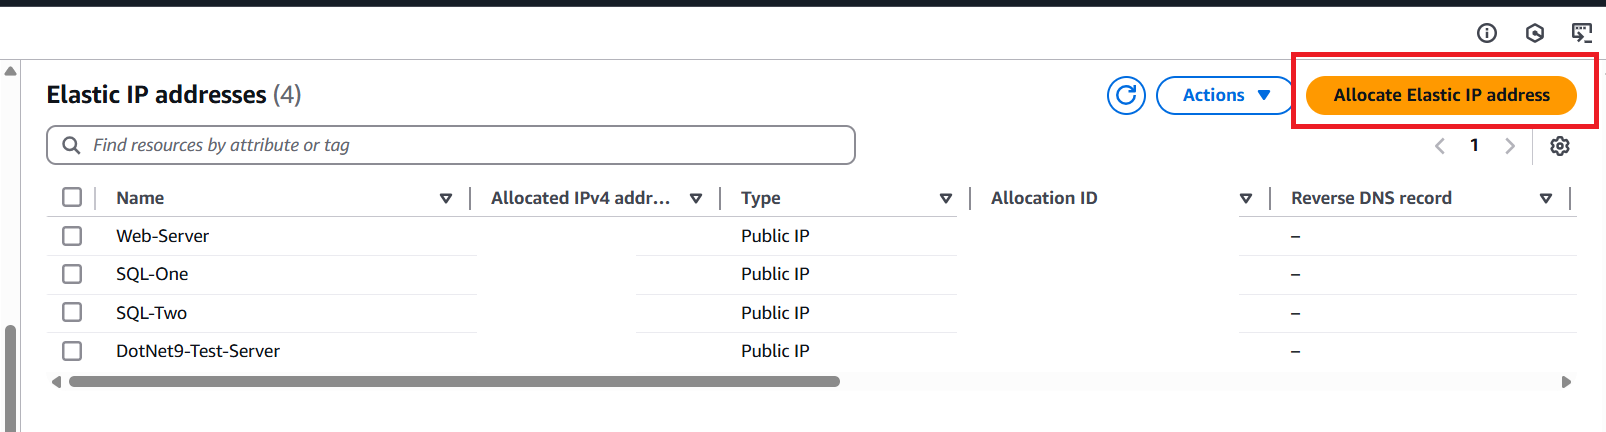
f. Assigning Elastic IP
Navigate to Network & Security > Elastic IPs.
Click Allocate Elastic IP Address.
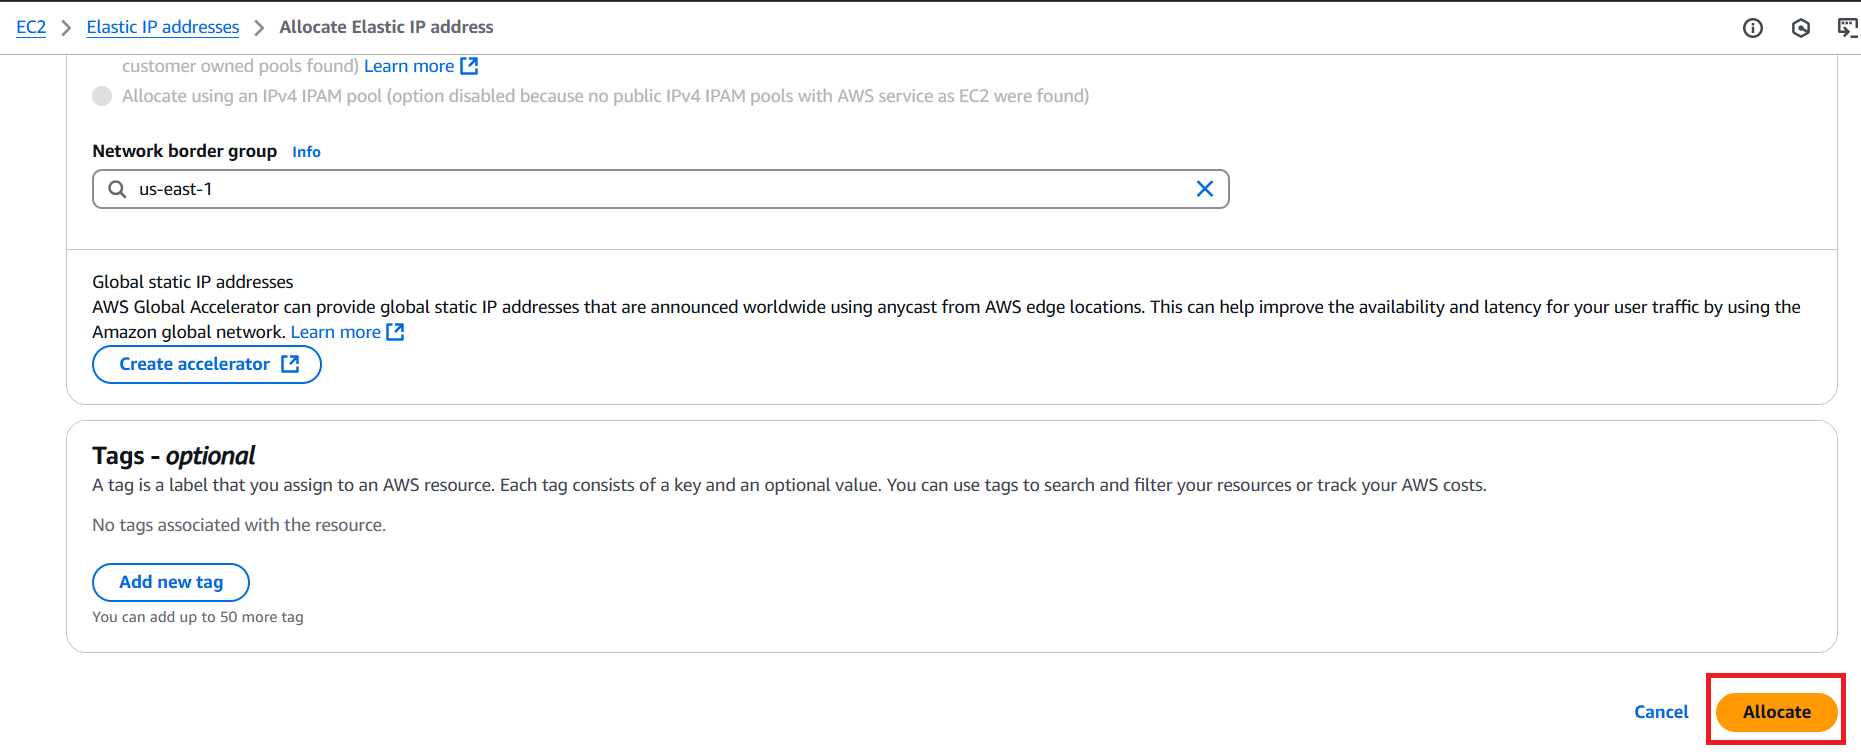
Without changing any settings, click Allocate.
Rename the allocated IP for easy identification (e.g., Test Server).

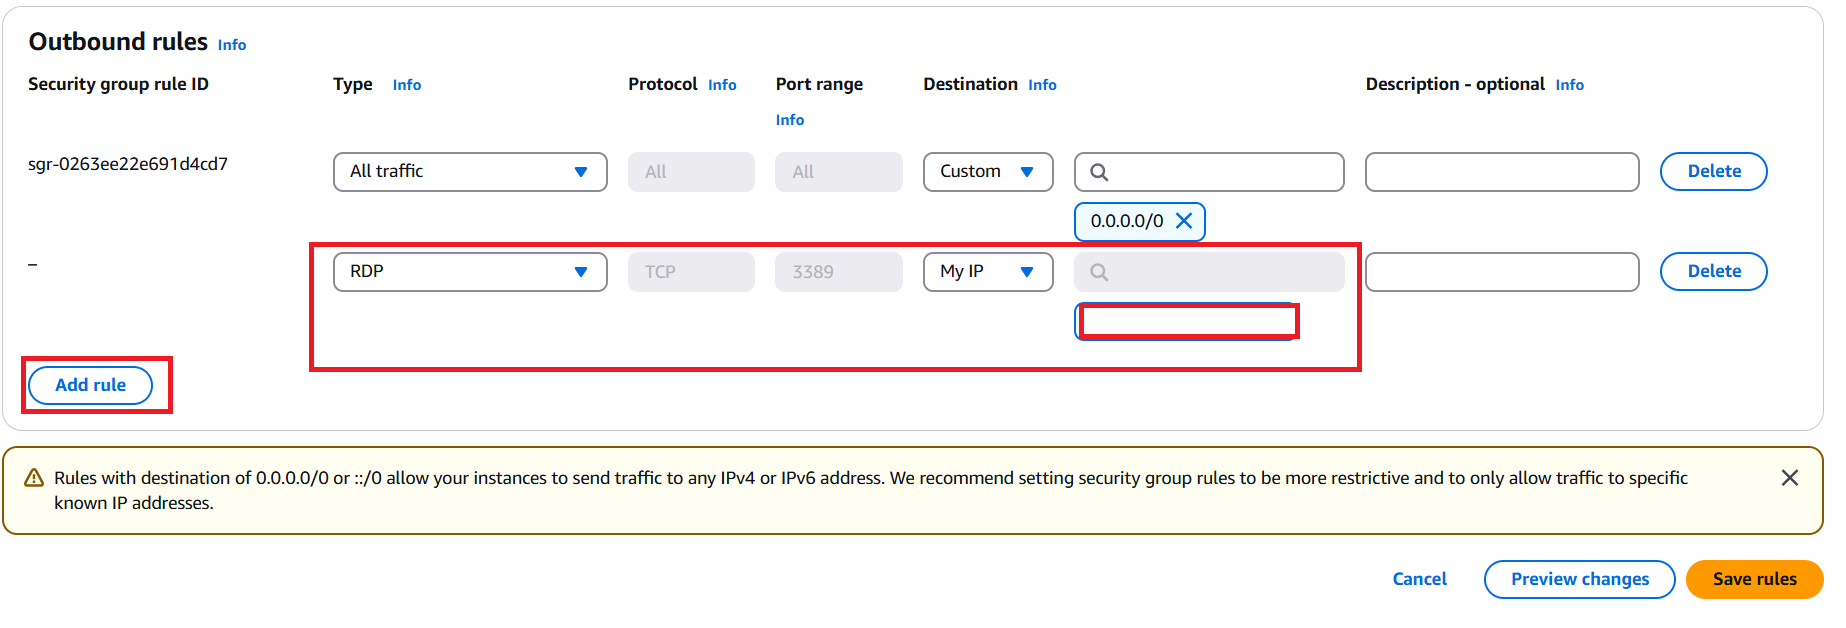
g. Configure Security Group for Remote Access
- Navigate to Security Groups.
- Select your server instance.
- Click Edit Inbound Rules.
- Click Add Rule.
- Select Type: RDP, Destination: My IP.
- Click Save Rule.
h. Decrypt Windows Password
- Select Instance > Click on Newly Created Server.
- Click Connect.
- Choose RDP Client.
- Download Remote Desktop File.
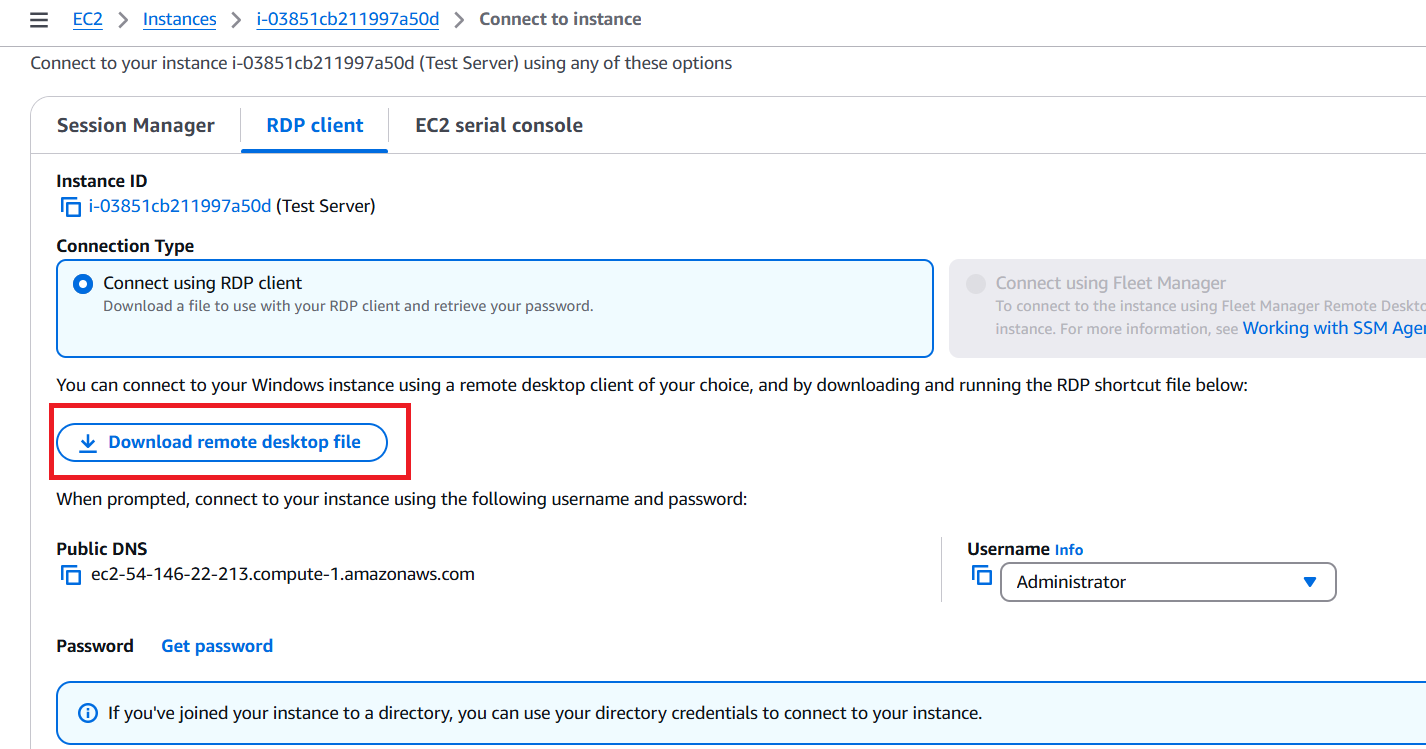
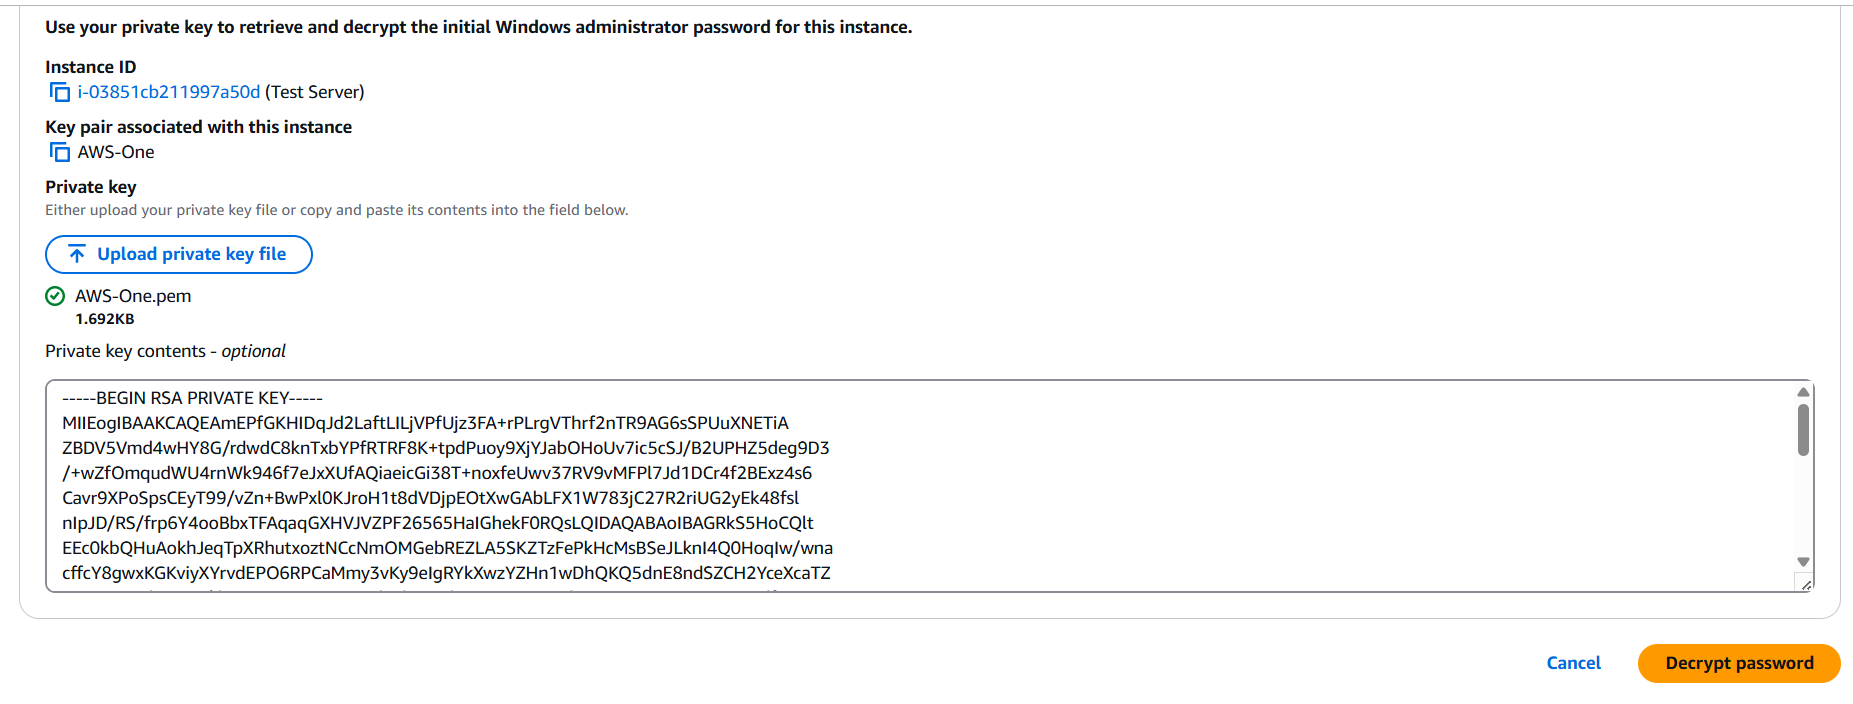
- Click Get Password, upload the Private Key File (.PEM) to decrypt the Windows password.
- Use the decrypted password to log into the server.
i. Configure Initial Server Settings
- Open Server Manager.
- Click Configure this local Server

- Set Time Zone to
UTC +5:30 (Chennai, Kolkata, etc.).
- Disable IE Enhanced Security Configuration for Administrators.

2. Install Necessary Software
a. S3 Browser
- Download and install S3 Browser.
- Set up an S3 account using the Access Key and Password.
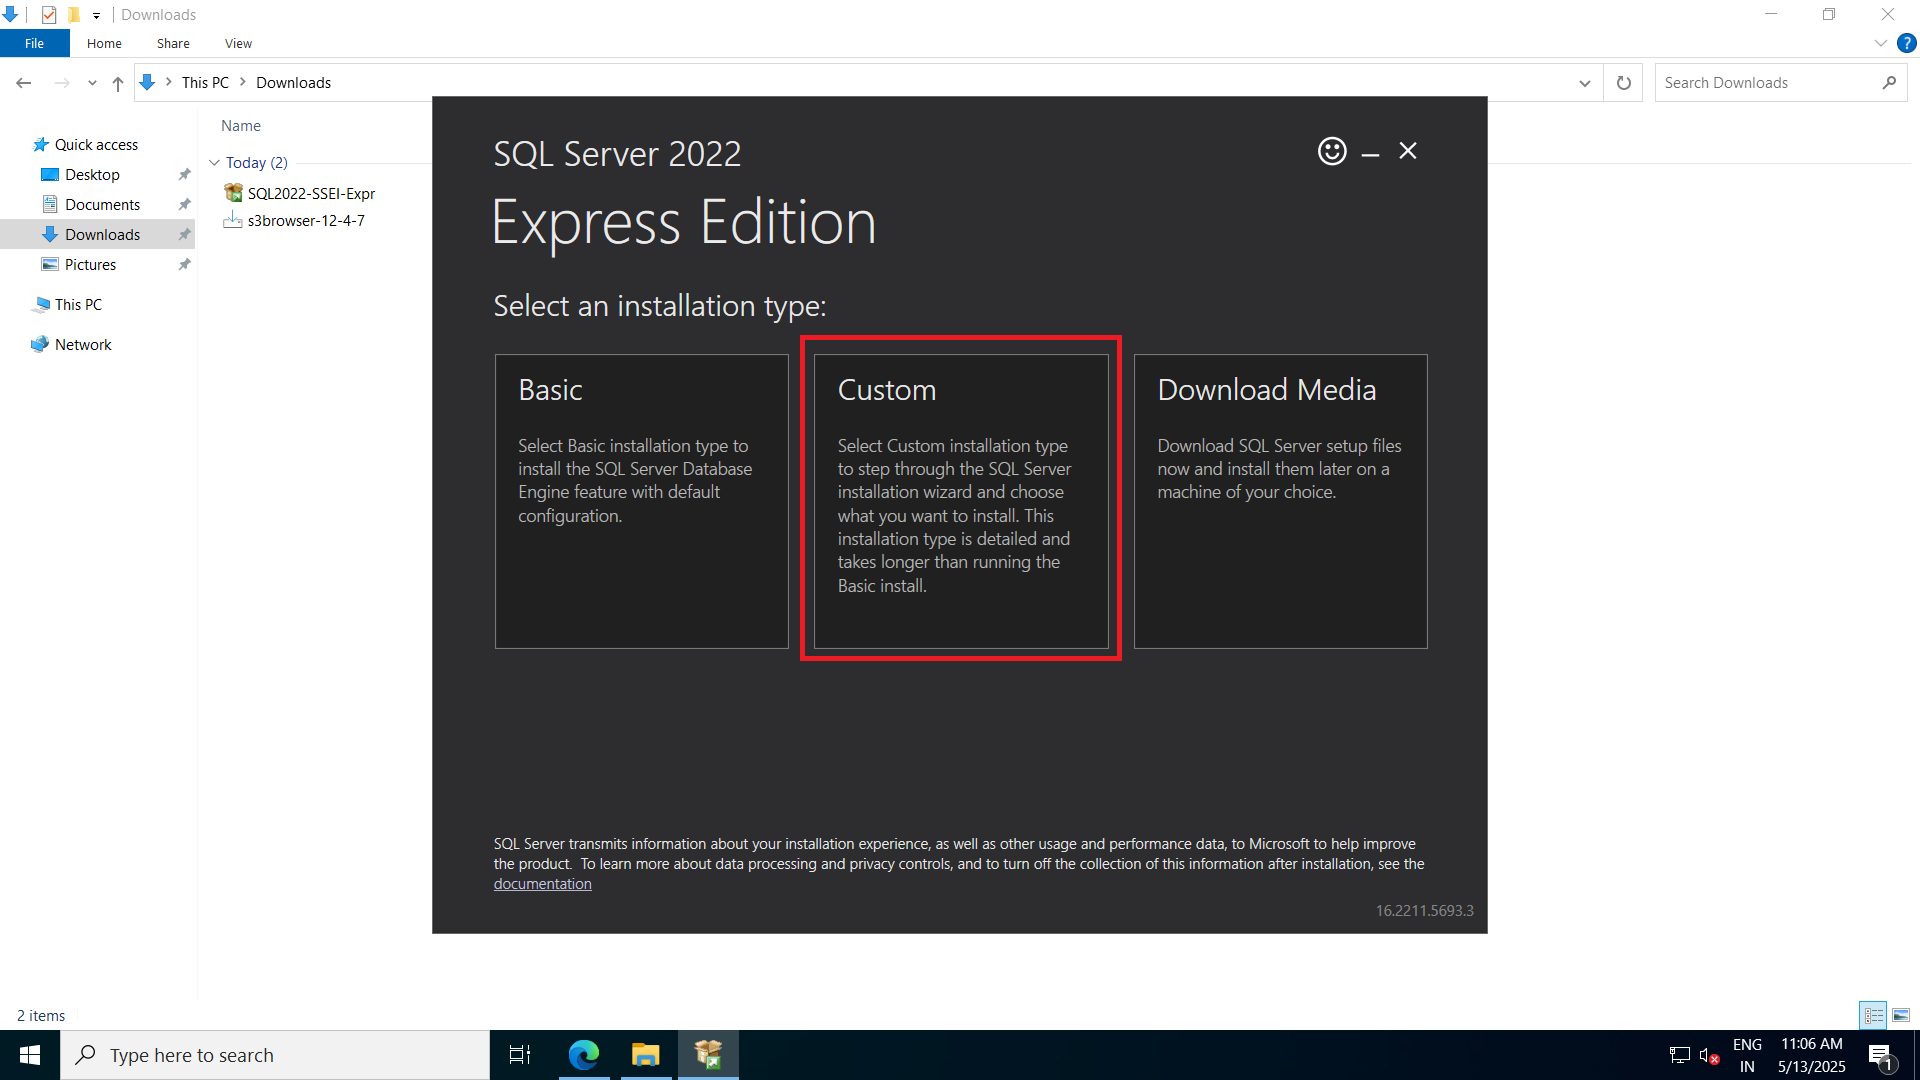
b. SQL 2022 Server
- Download and install SQL 2022 Server.
- Select Custom
- Click on all default values in planning, in installation select New SQL Server installation or add features to an existing installation

- Click on use microsoft updates
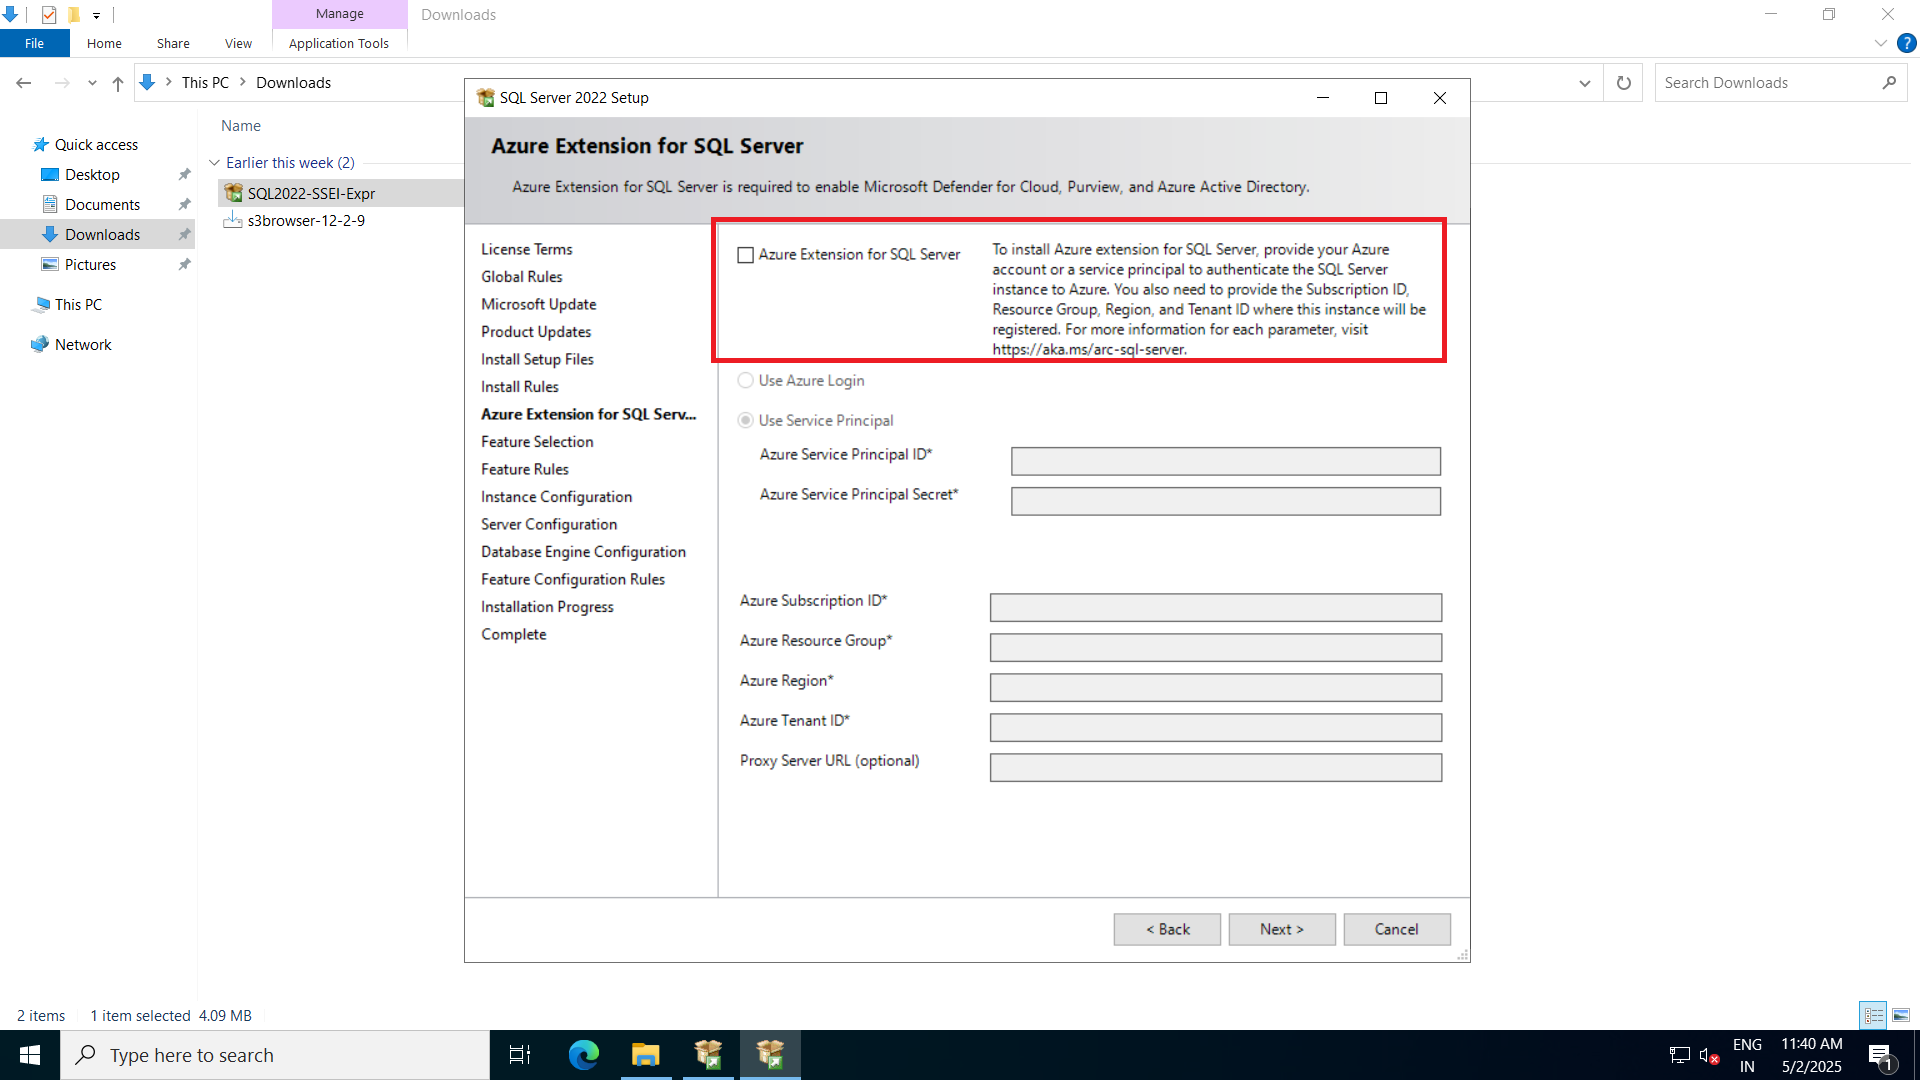
- Select all the default values and in Azure Extension for SQL Sever Disable Azure Extension for SQL server
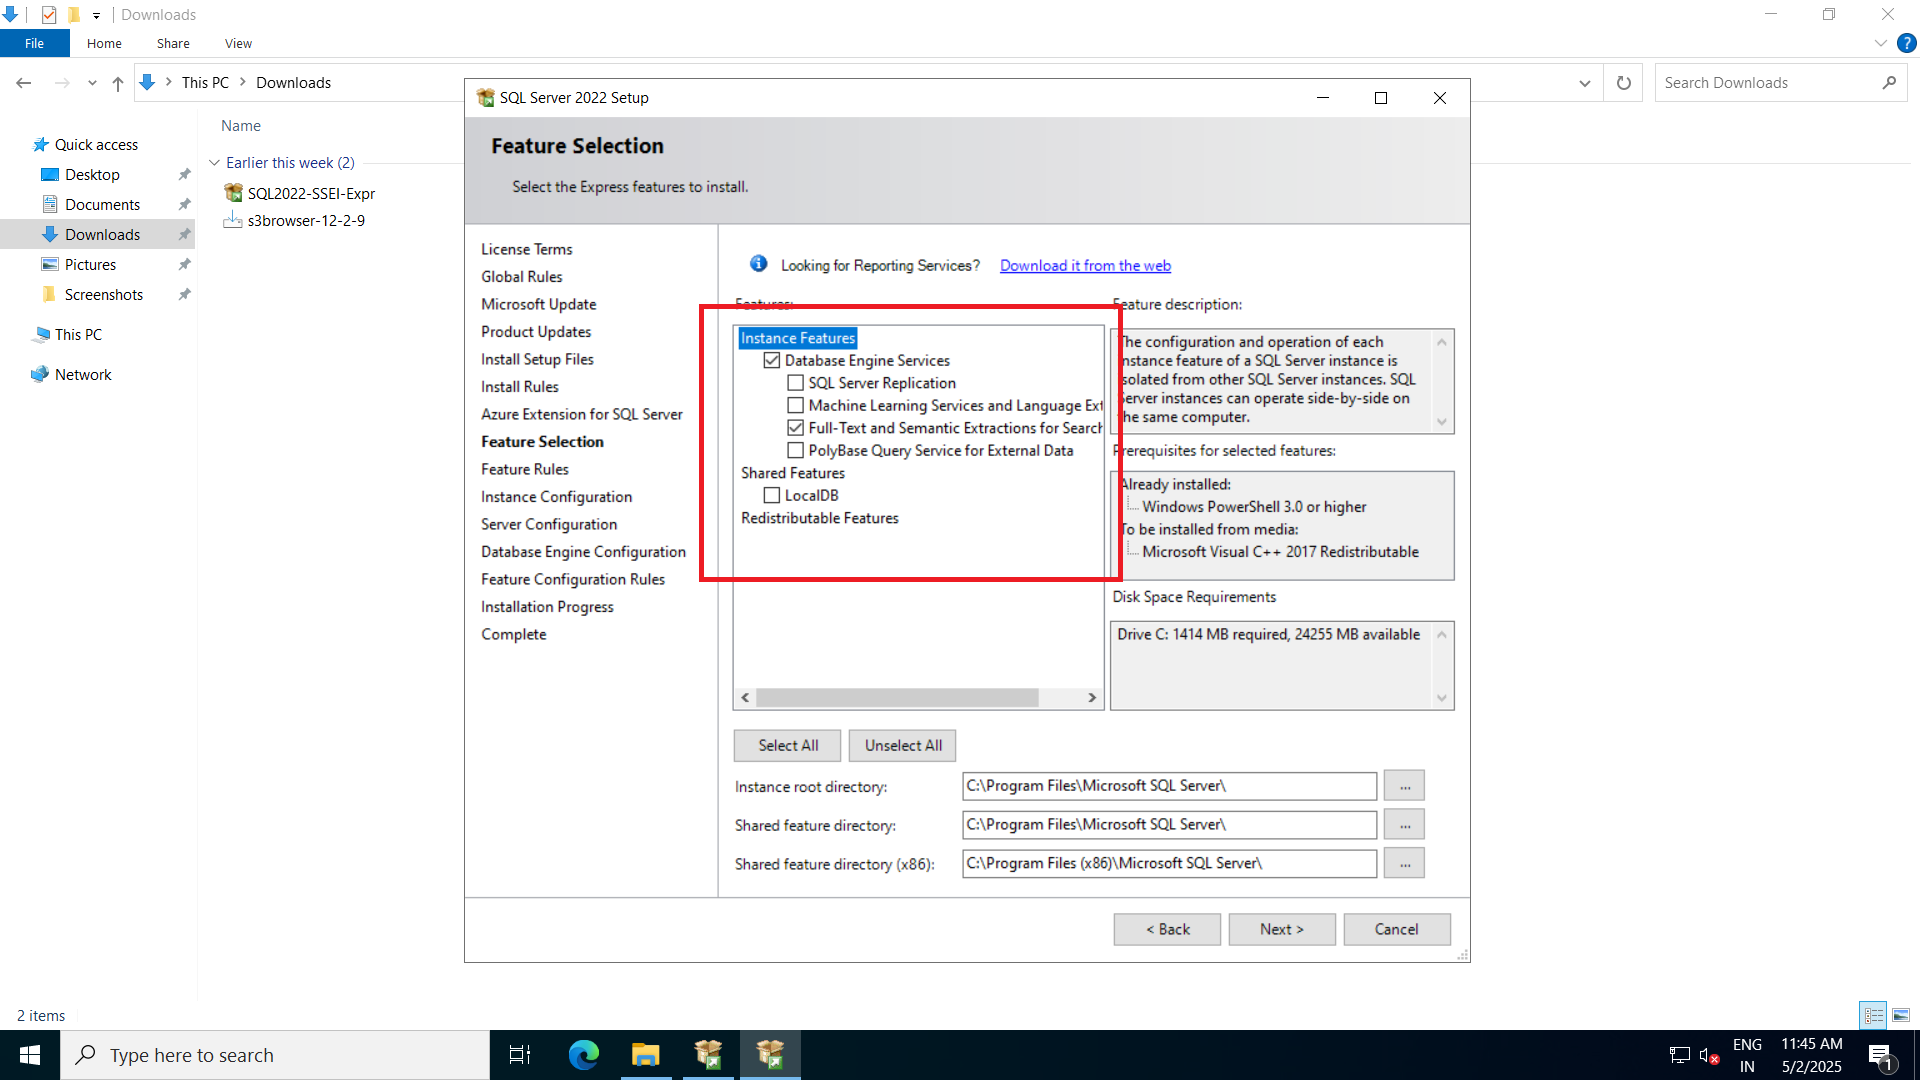
- In feature Selection only Select Full Text and Semantic Extractions for search
- In Server Configuration Disable SQL server Browser and grant permission

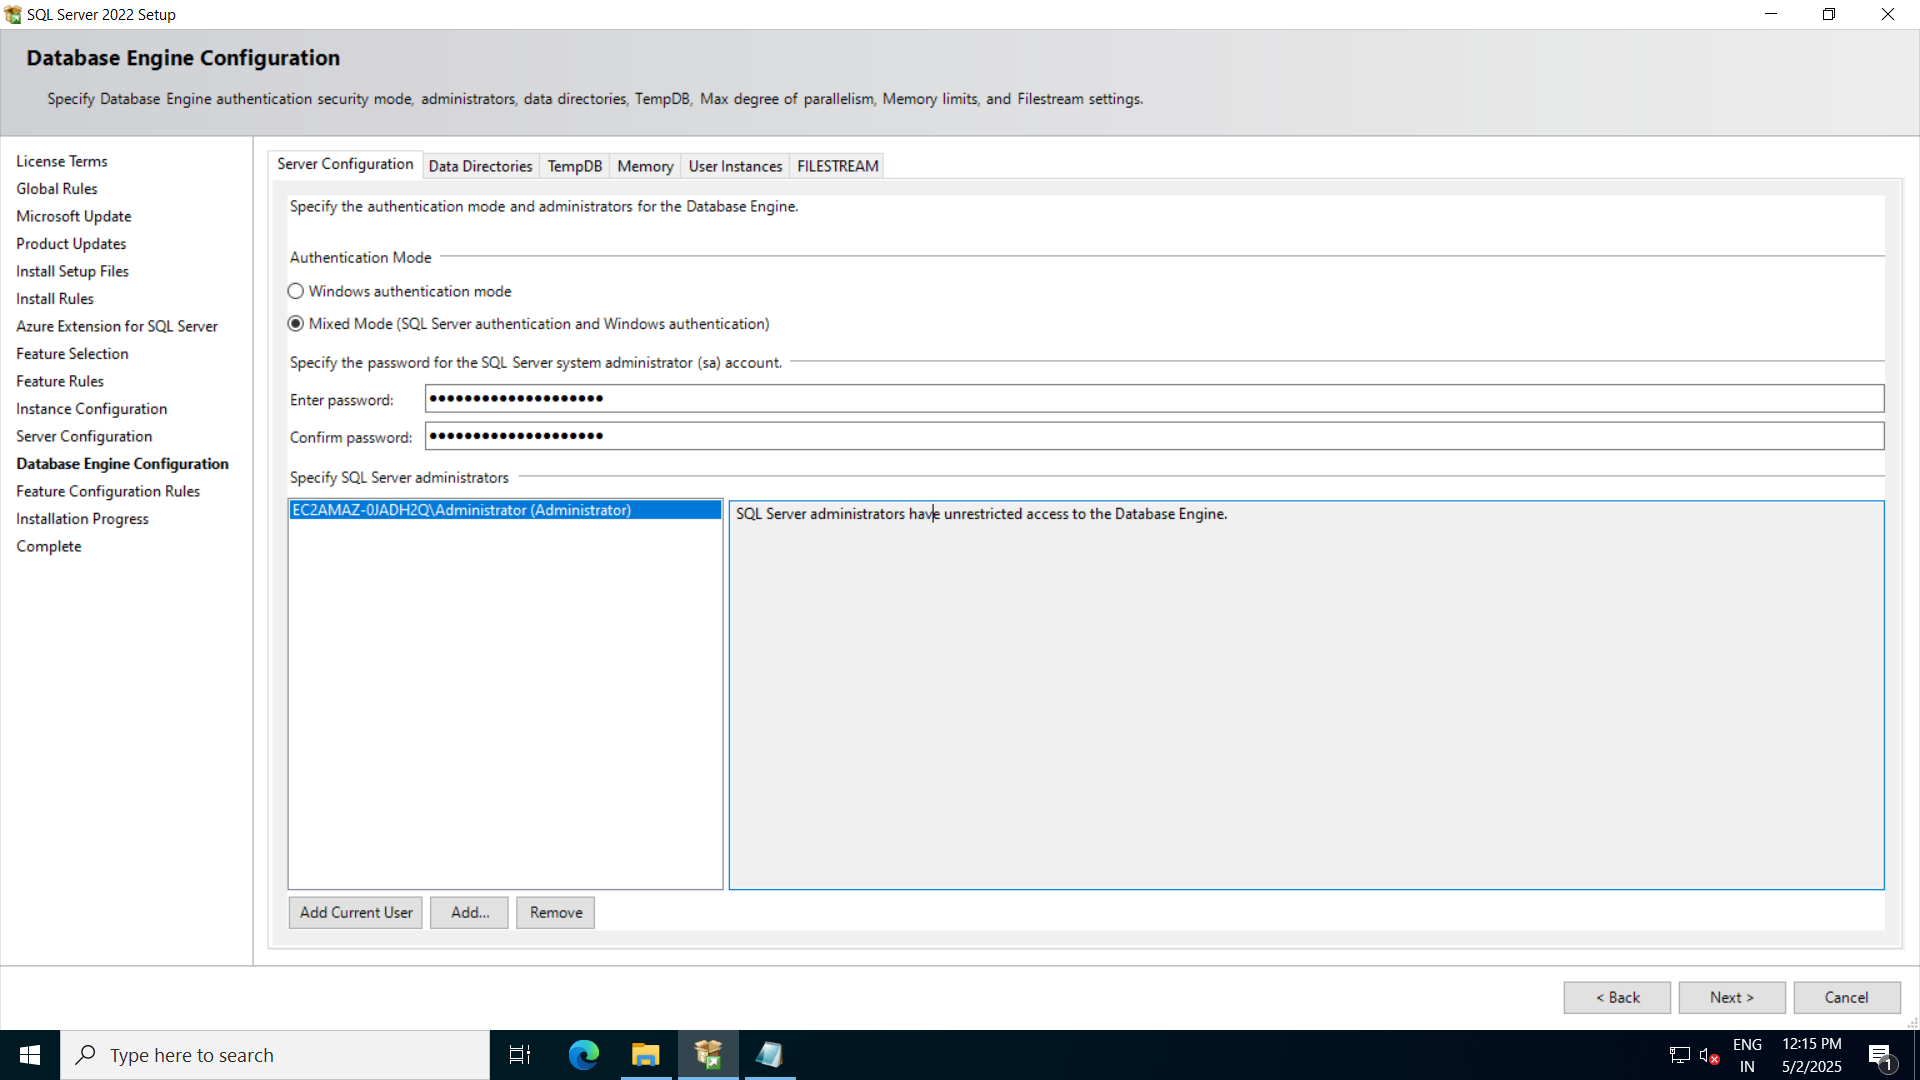
- In Database Engine configuration select Mixed Mode and create a Password
- Select all the default values further and complete the installation
c. SQL cmd
- Download and install sqlcmd from S3 Browser
- Right-click This PC > Properties.
- Click Advanced system settings > Environment Variables.
- Under System Variables, select Path, click Edit.
- Click New, paste the folder path (for e.g. C:\Program Files\Microsoft SQL Server\Client SDK\ODBC\170\Tools\Binn) and restart the RDP
d. SQL Restore Setup
- Download and Install SQL Restore Setup
e. AWSCLIV2
- Download and Install AWSCLIV2 from S3 browser
f. 7Z
- Download and install 7Z from S3 browser
- Right-click This PC > Properties.
- Click Advanced system settings > Environment Variables.
- Under System Variables, select Path, click Edit.
- Click New, paste the folder path(C:\Program Files\7-Zip) and restart the RDP
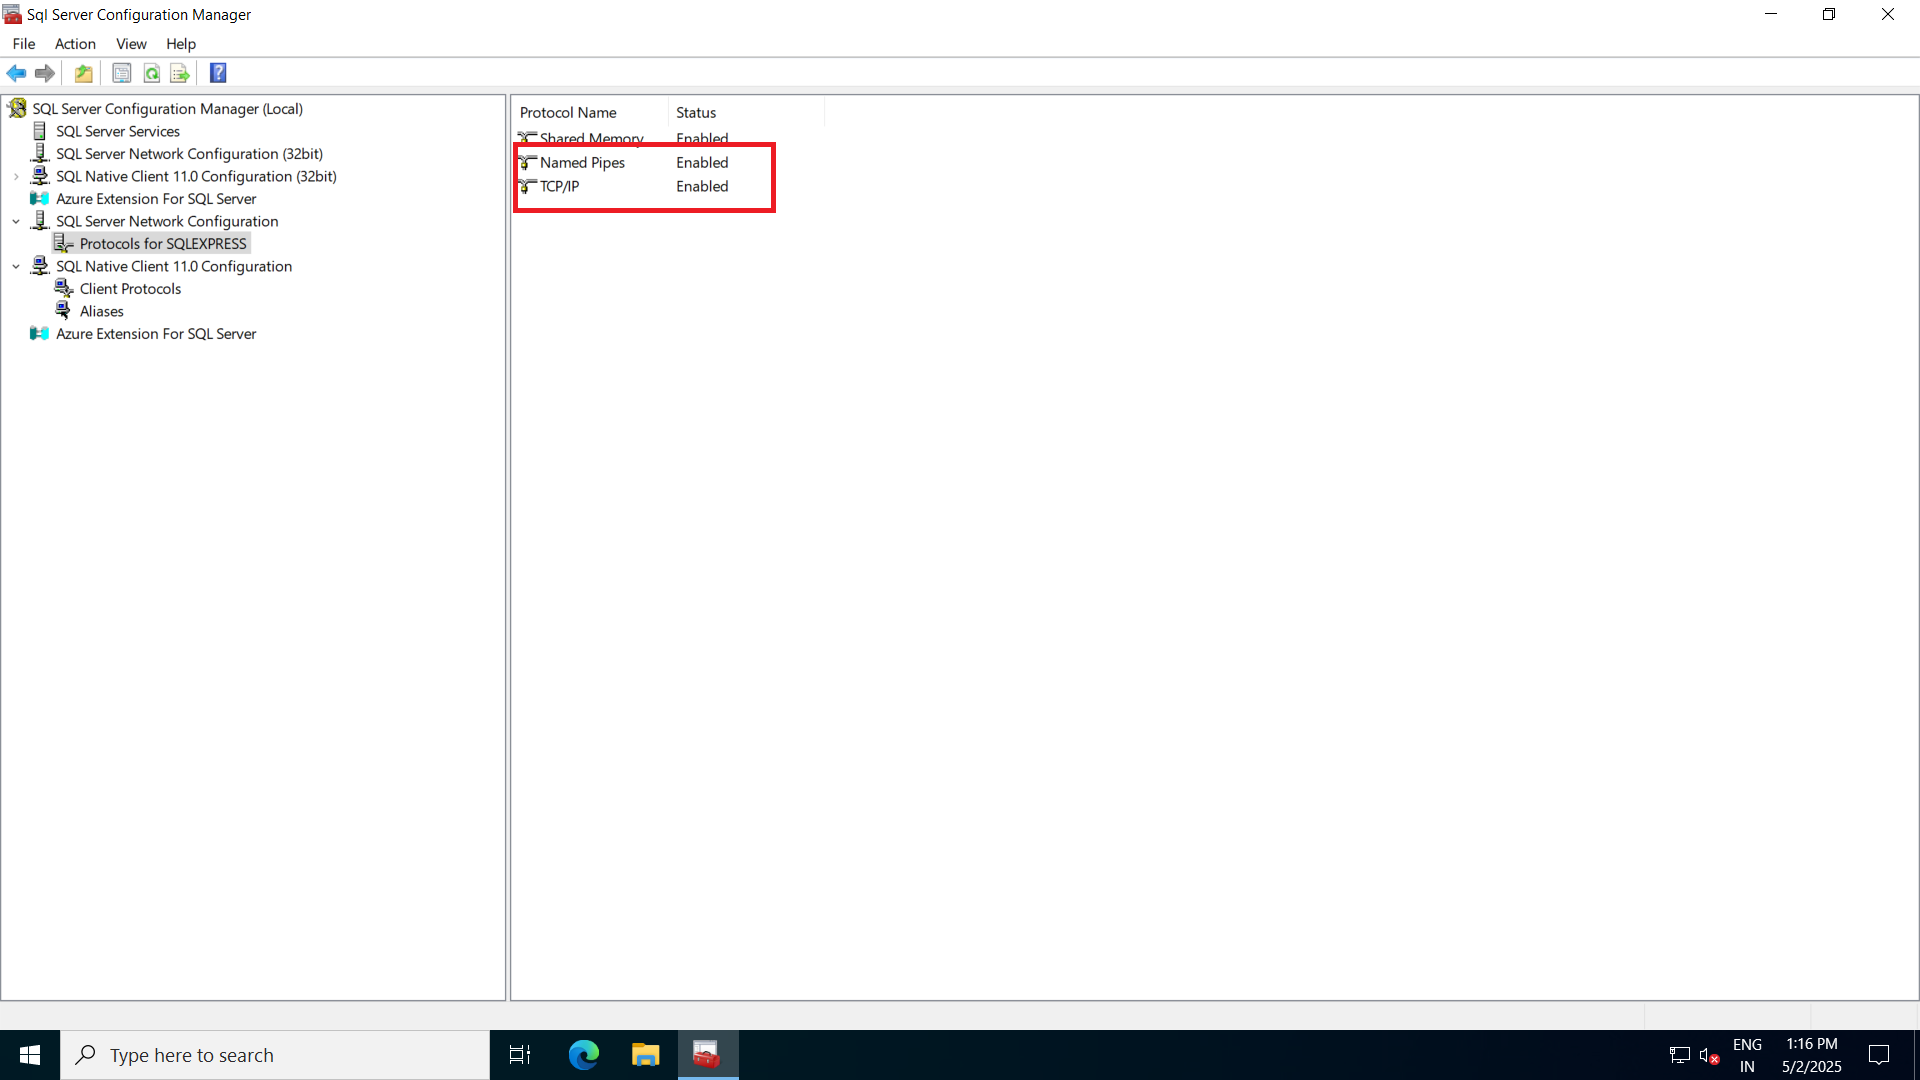
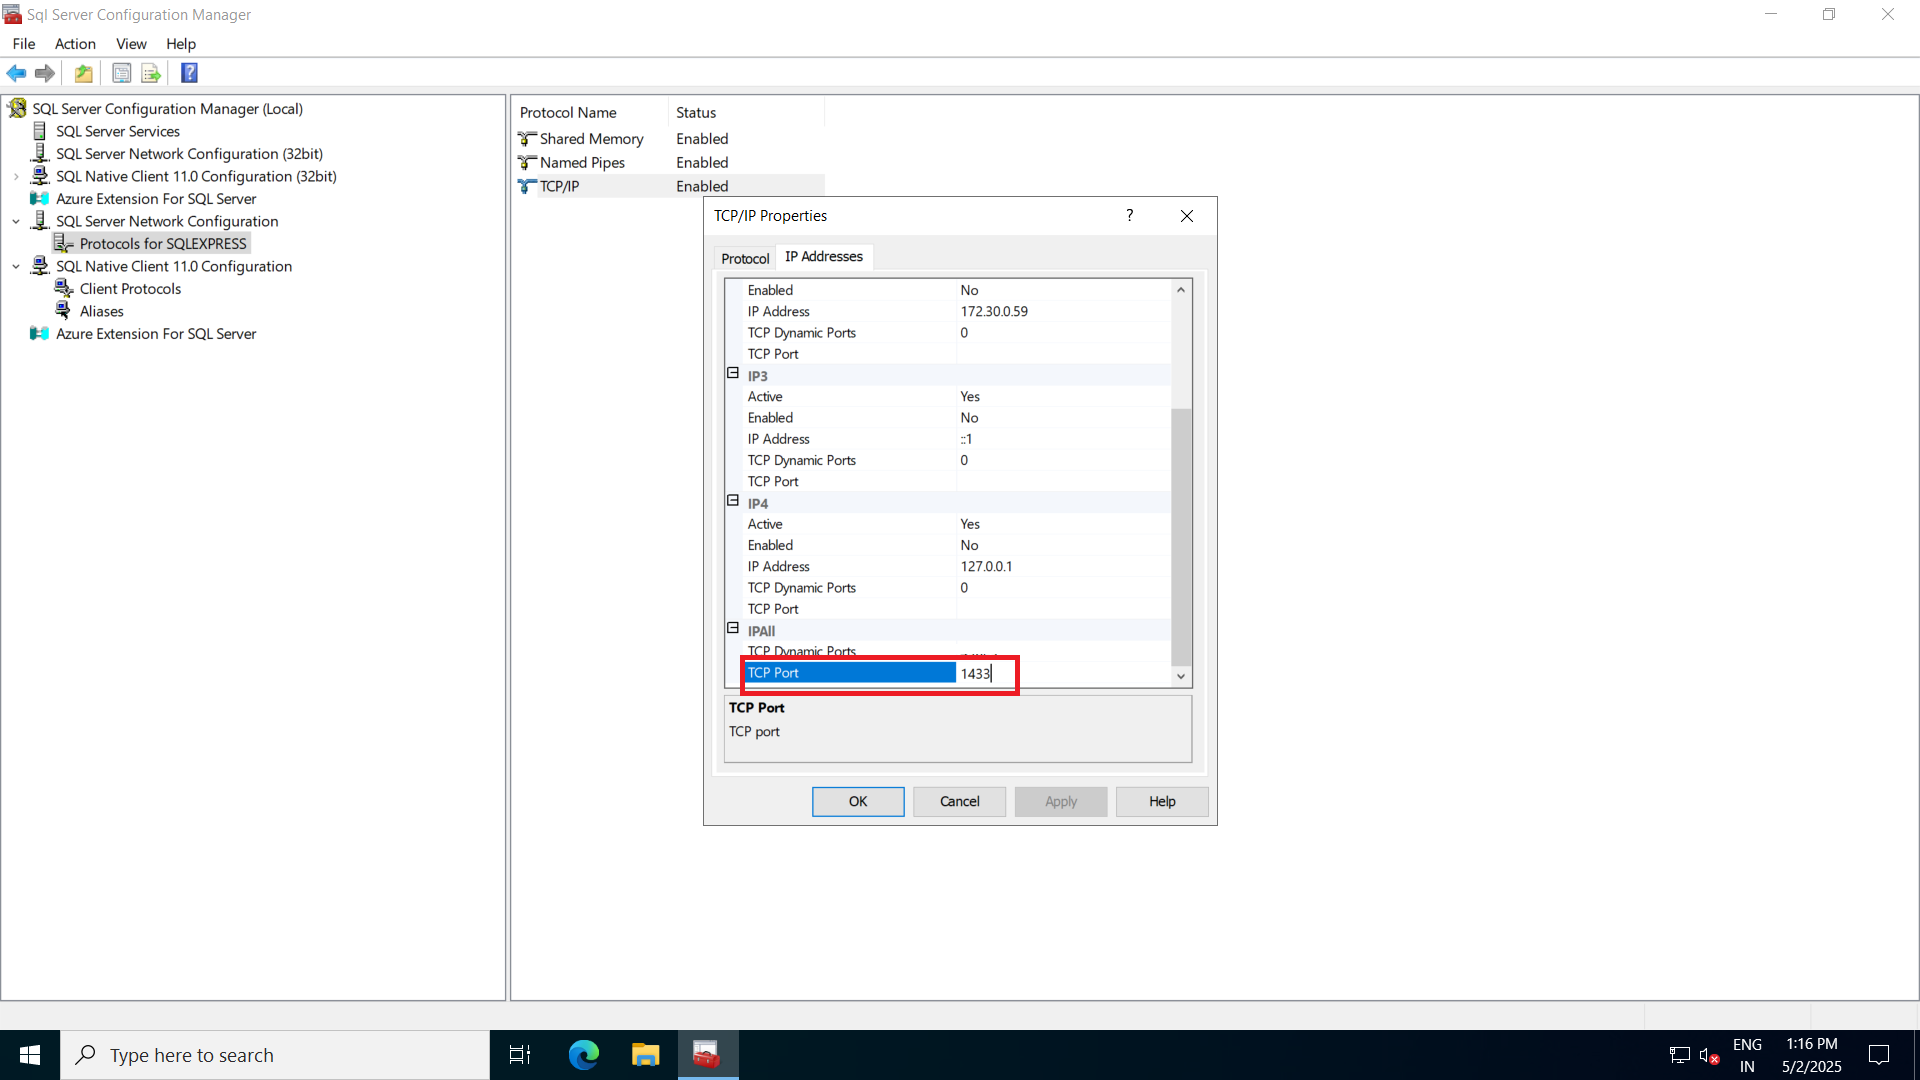
3. Changes in SQL server 2022 configuration Manager
- Go to SQL server 2022 configuration Manager
- Click on Protocols for SQLEXPRESS

- Enable Named Pipes and TCP/IP
- In TCP/IP click on properties, go to IP Addresses—> IPALL and inside TCP Port write 1433
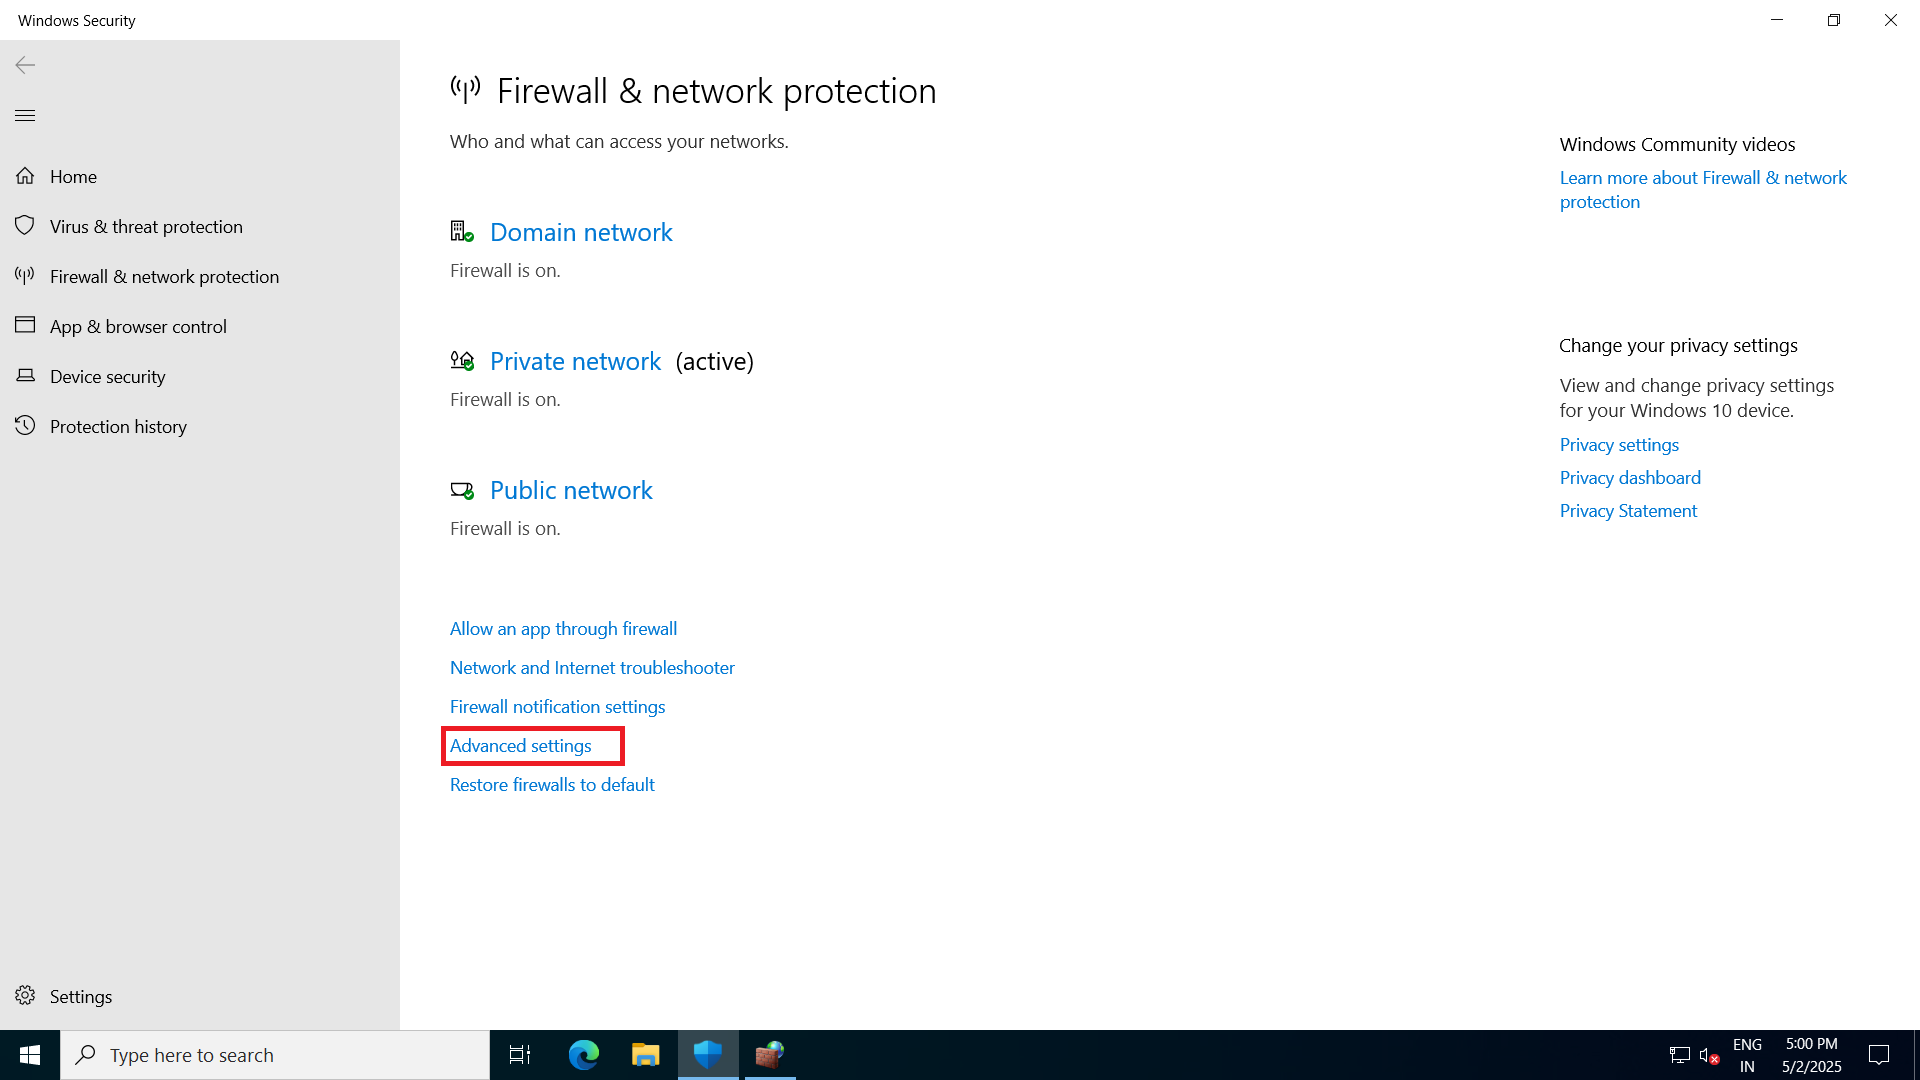
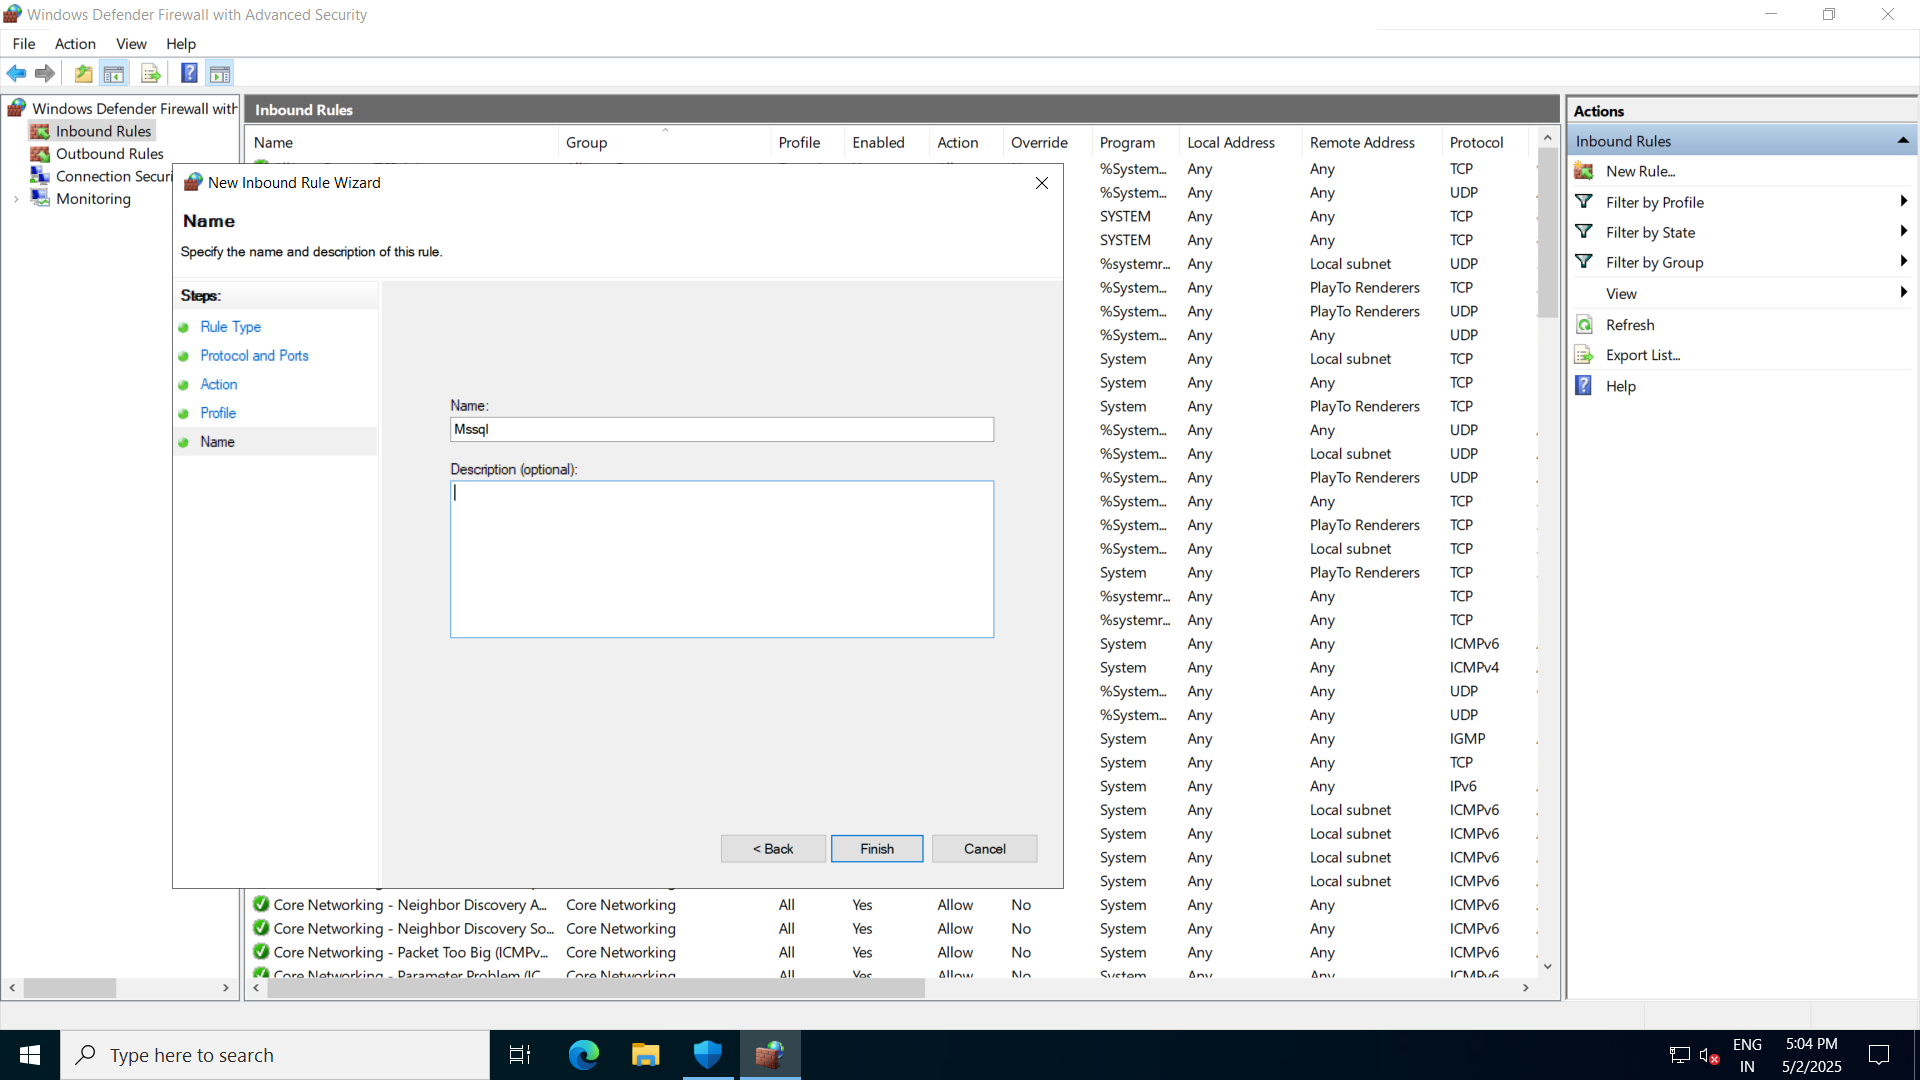
4. Changes in Firewall and Network Protection
- Go to Firewall and Network Protection
- Click on Inbound rules–> add rule
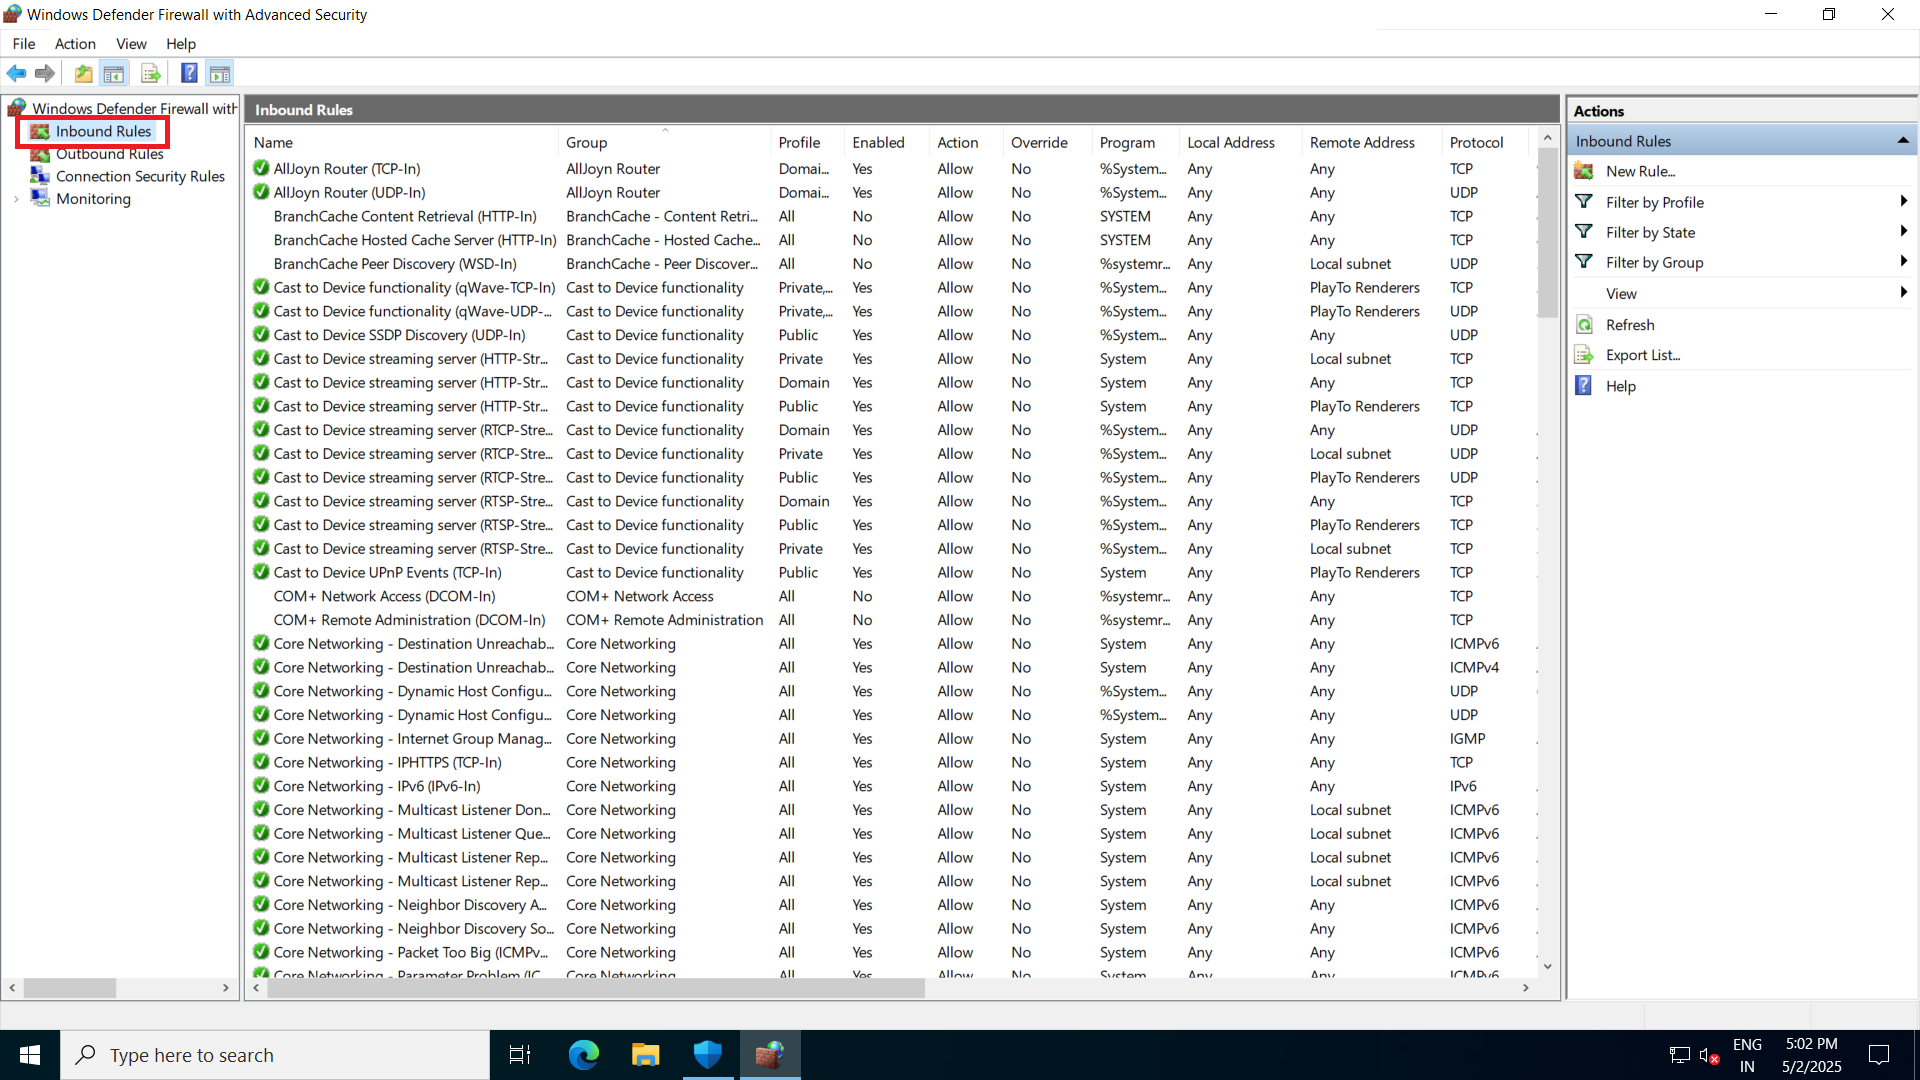
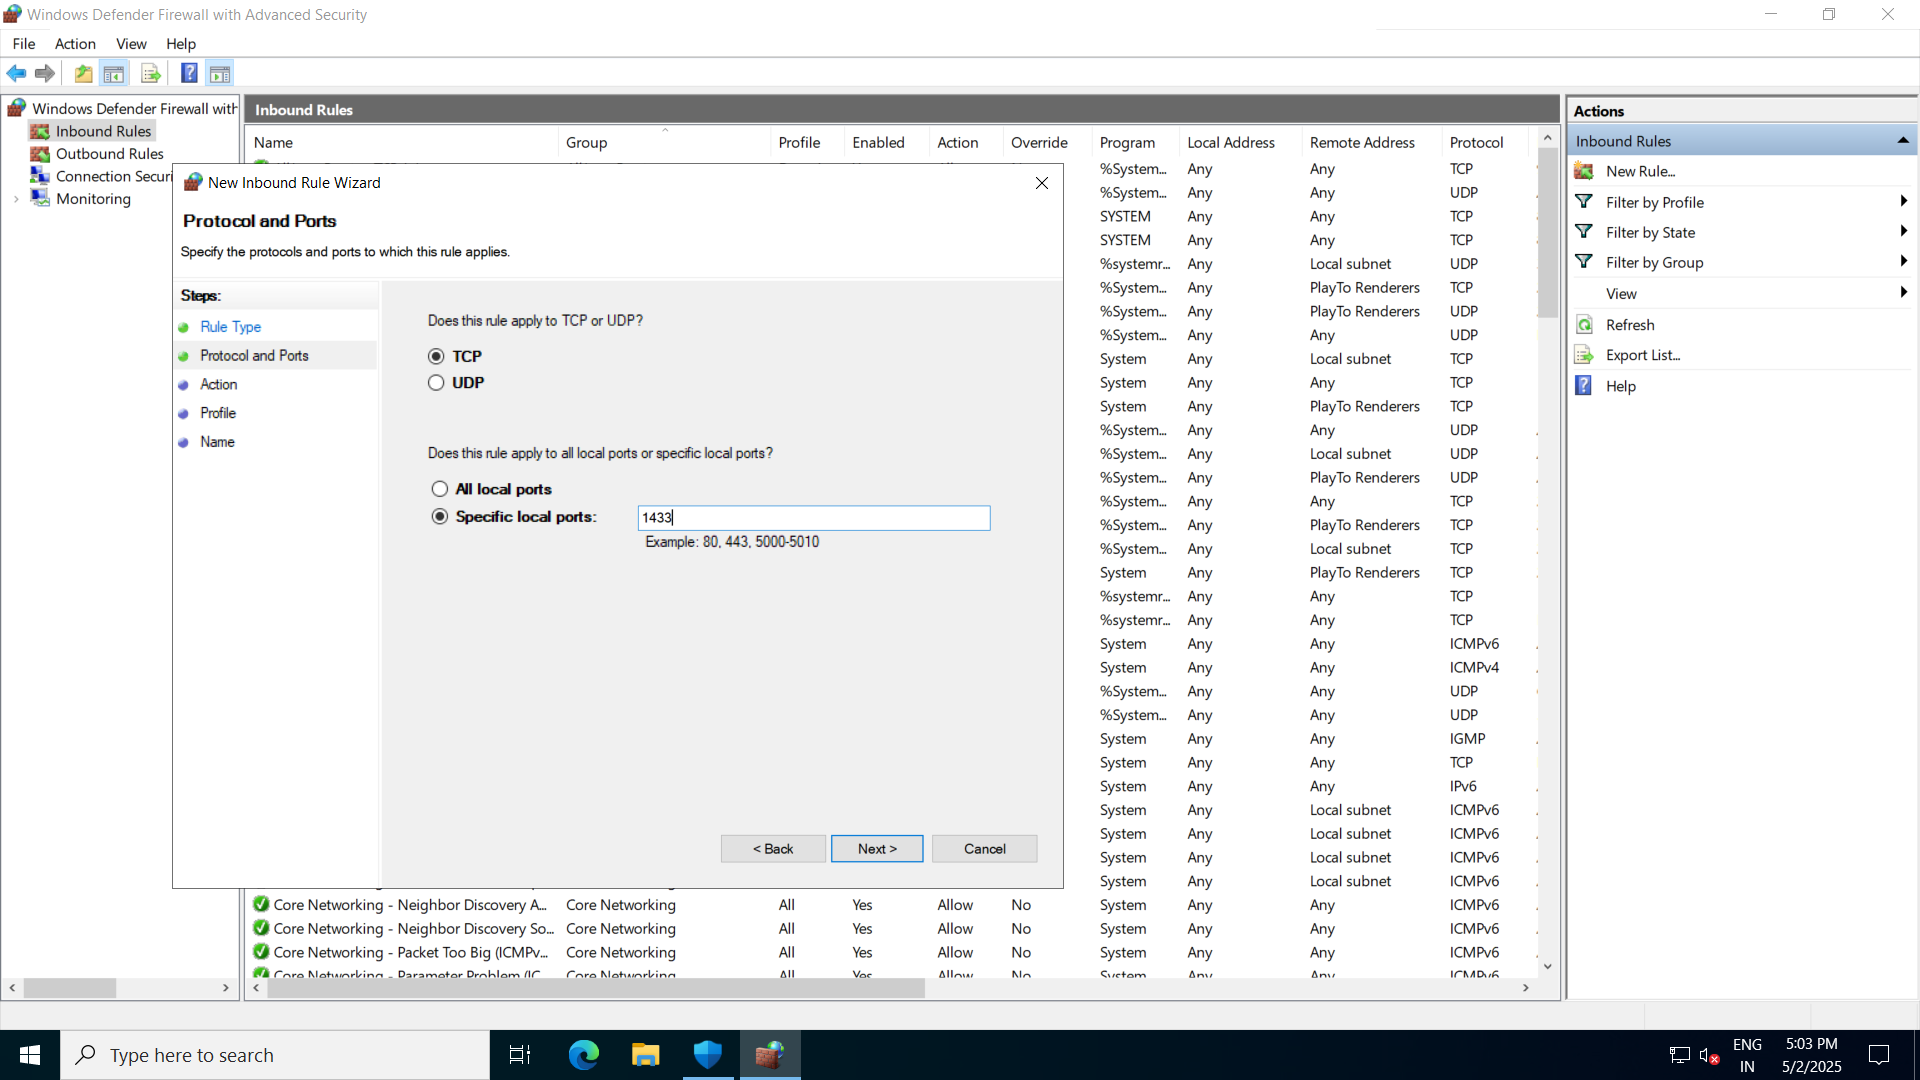
- Select Port

- In Specific Local Ports enter 1433
- Select Domain, Private, Public

- Enter the name and click Finish
5. Other changes
- copy the .aws(user» Administrator) folder from SQL one to the new server
- copy the batch files from the download folder for old server to new server
- Run the backup files once in old SQL so that all the backups will be synced in S3
- Stop the old server
- In new server from S3 download all the latest backups and restore them
- Copy the IP of the new server and passowrd in all the JSON files