Web Server Set Up
Deploying ERP Crystal Web App on Server
1. Set Up Server
a. Login to AWS Management Console
- Go to AWS Console and sign in.
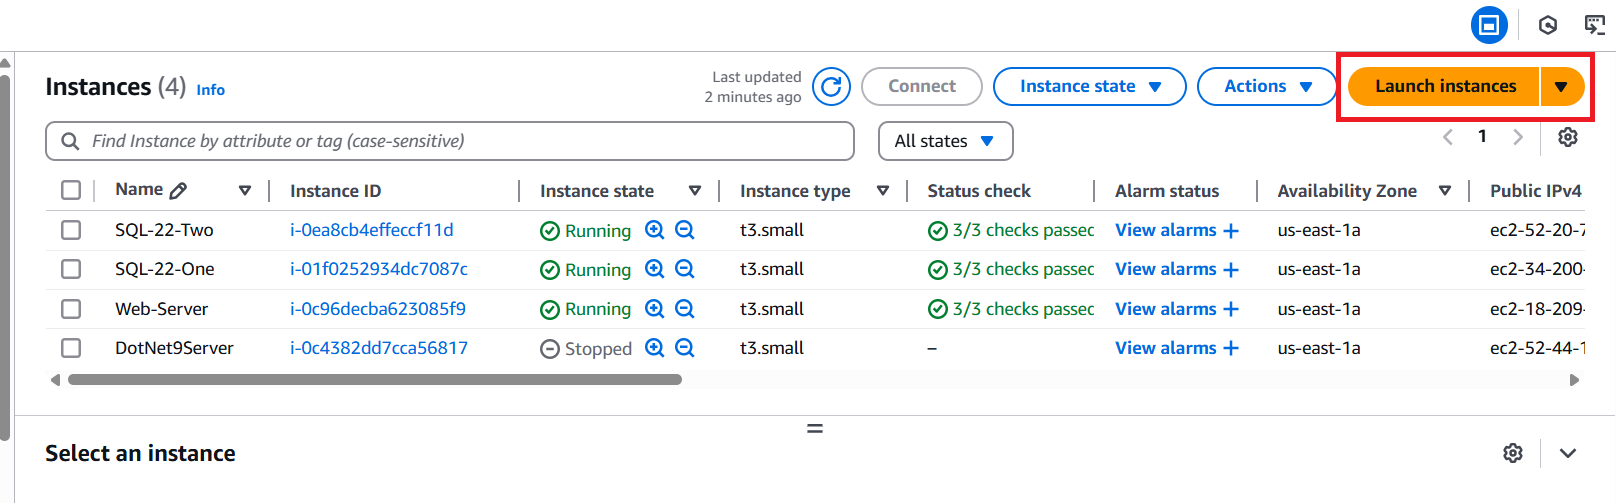
- Navigate to EC2 Instances from the left panel.
b. Launch an EC2 Instance
Click Launch Instance.
Provide a suitable server name (e.g., New Server).
Choose Microsoft Windows Server 2022 Base from the Application and OS Images (Amazon Machine Image). (Avoid selecting core base).

Select Instance Type:
t2.small.Choose Key Pair:
AWS-One.
c. Configure Network Settings
- Enable Allow HTTPS and Allow HTTP traffic from the internet.

d. Configure Storage
- Set SSD Size:
40GB - Choose SSD Type:
gp3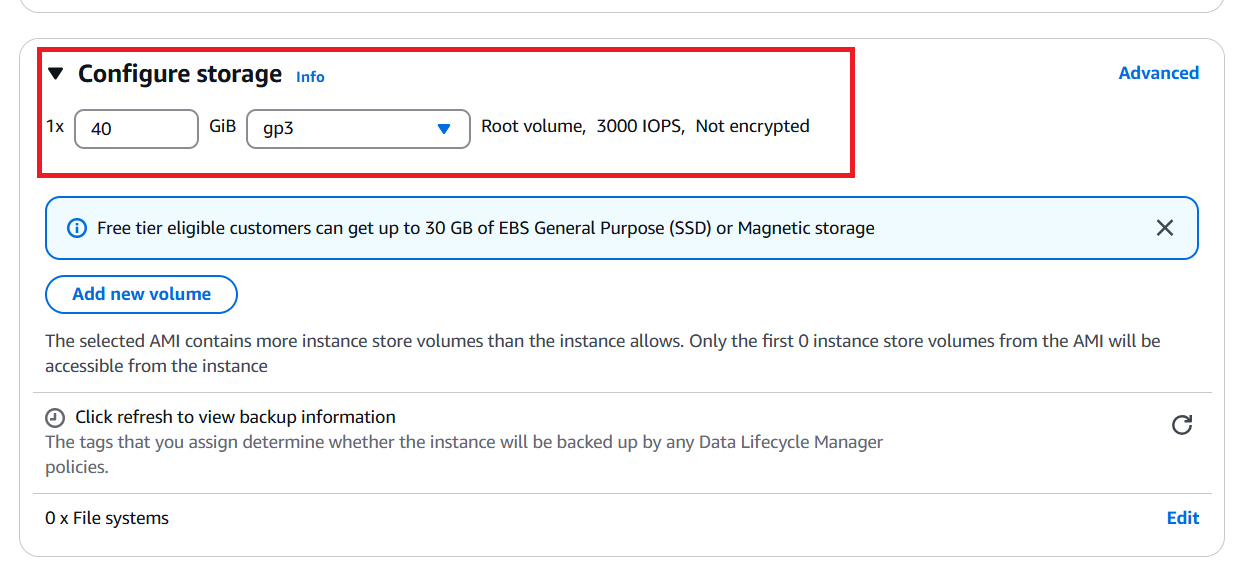
e. Advanced Settings
- Stop-Hibernate Behavior: Select
Disable - Termination Protection: Select
Enable - Click Launch Instance
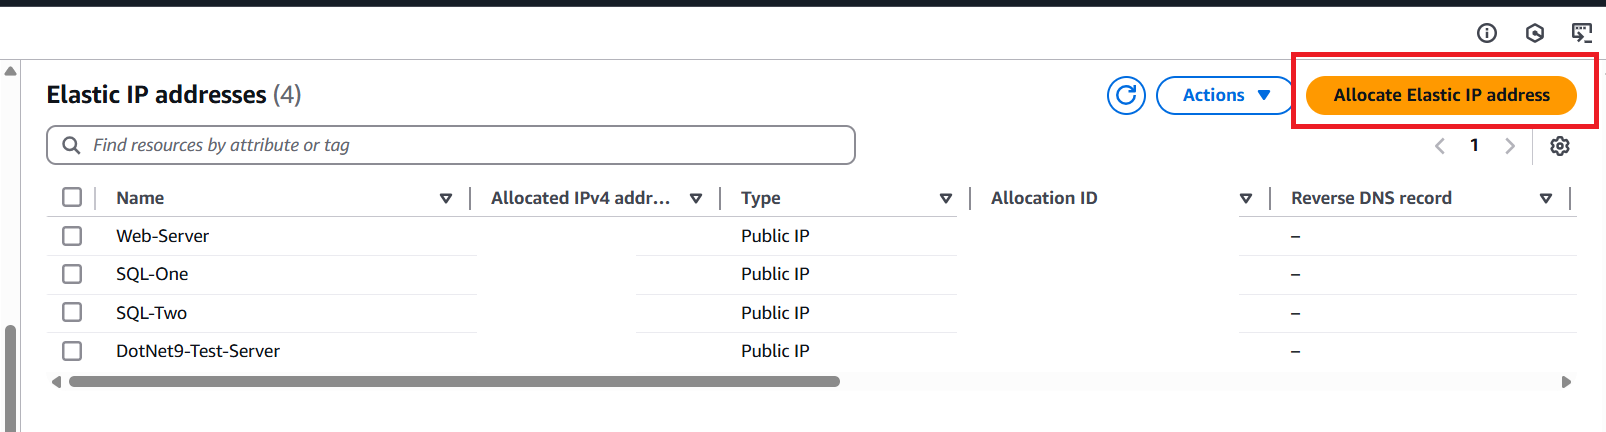
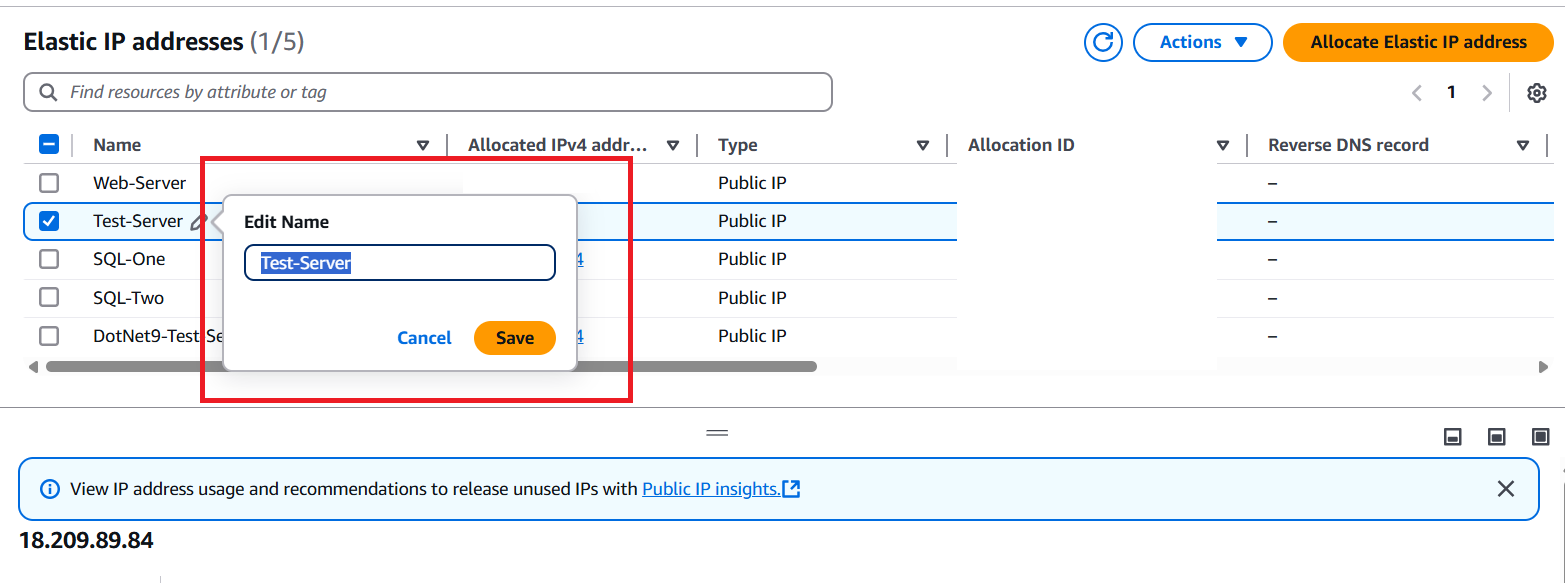
f. Assigning Elastic IP
Navigate to Network & Security > Elastic IPs.
Click Allocate Elastic IP Address.
Without changing any settings, click Allocate.
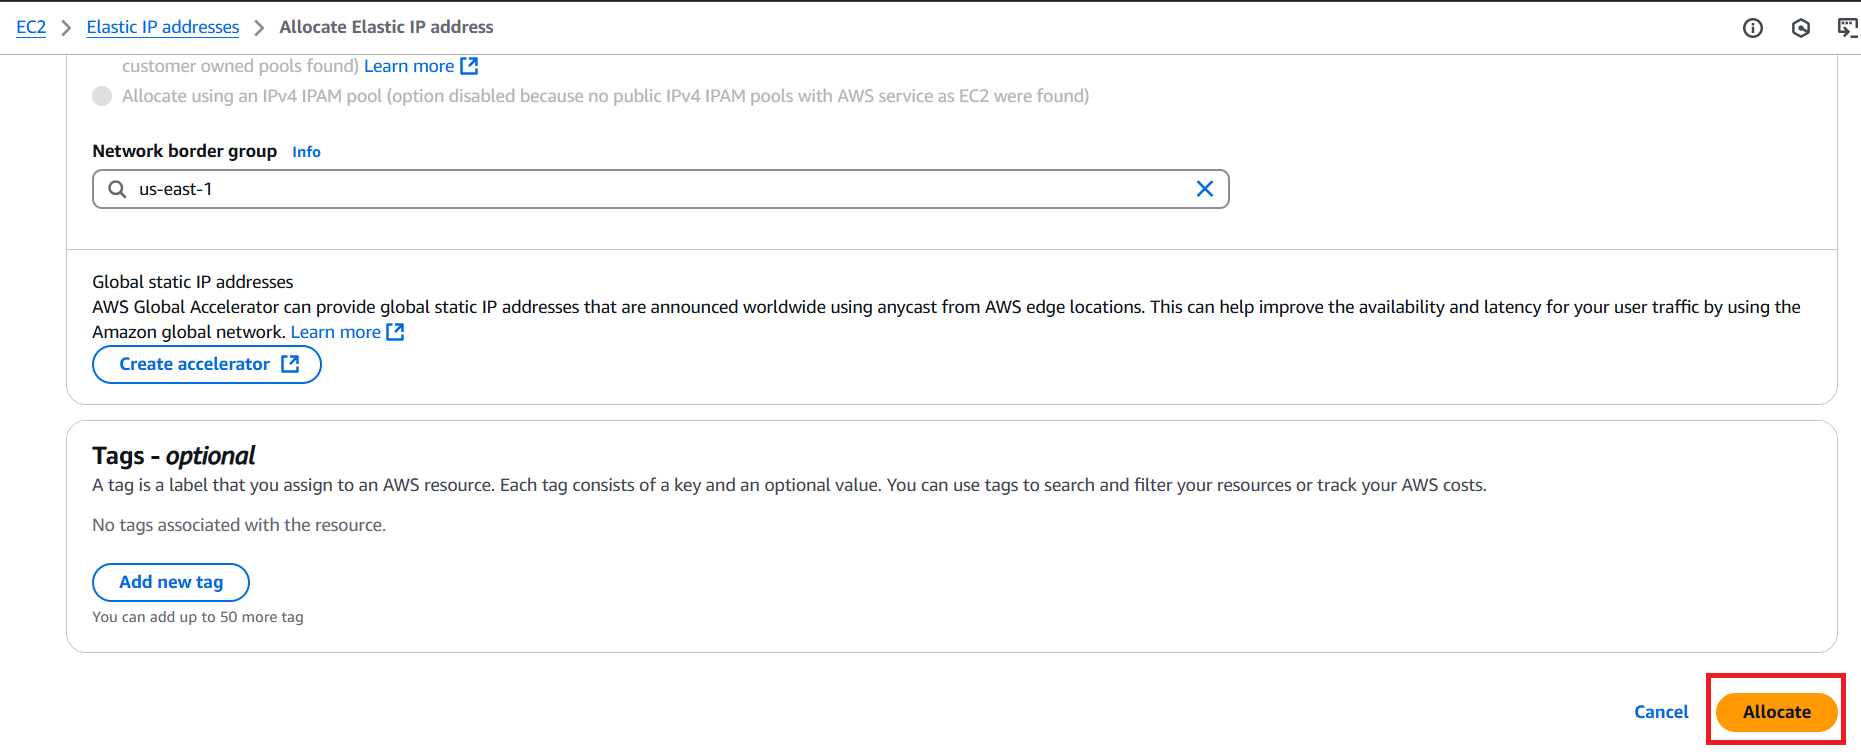
Rename the allocated IP for easy identification (e.g., Test Server).
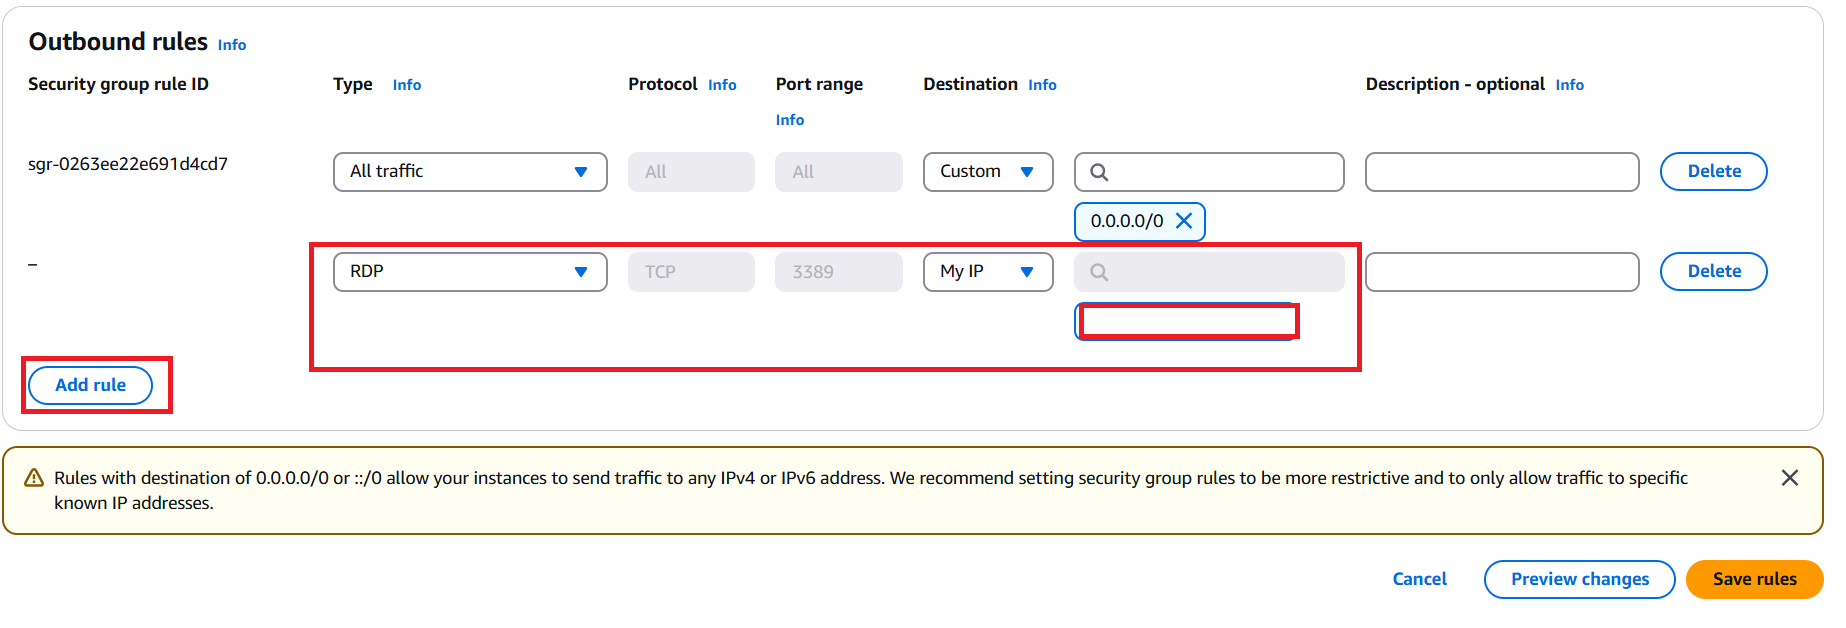
g. Configure Security Group for Remote Access
- Navigate to Security Groups.
- Select your server instance.
- Click Edit Inbound Rules.
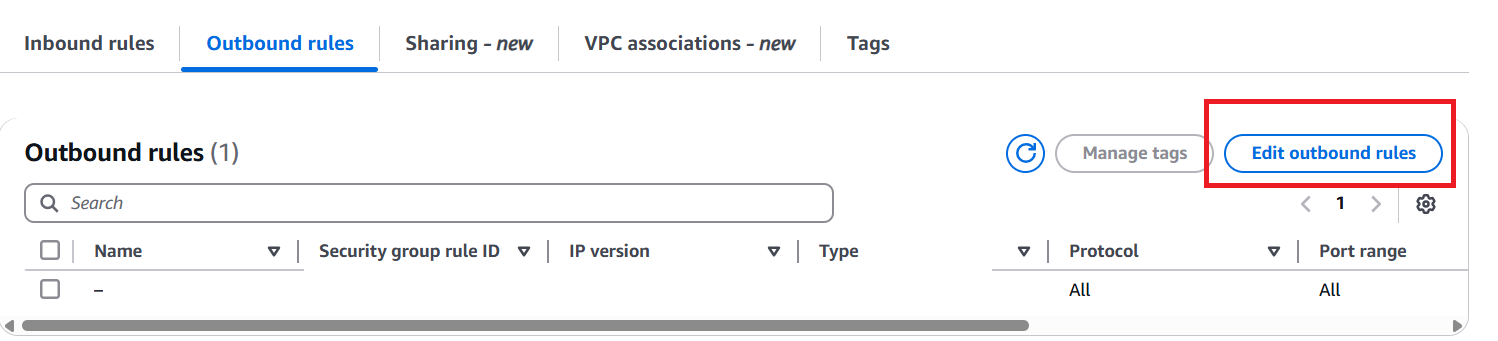
- Click Add Rule.
- Select Type: RDP, Destination: My IP.
- Click Save Rule.
h. Decrypt Windows Password
- Select Instance > Click on Newly Created Server.
- Click Connect.
- Choose RDP Client.
- Download Remote Desktop File.
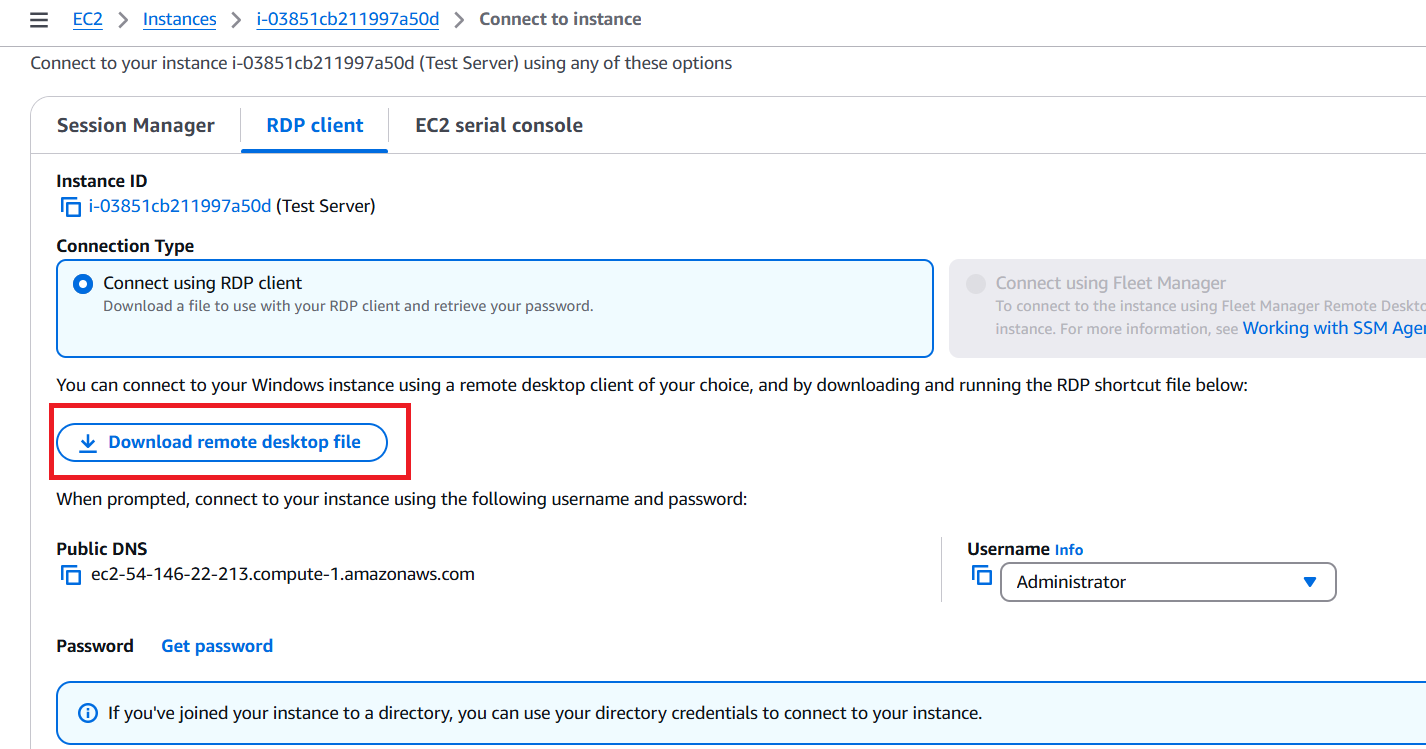
- Click Get Password, upload the Private Key File (.PEM) to decrypt the Windows password.
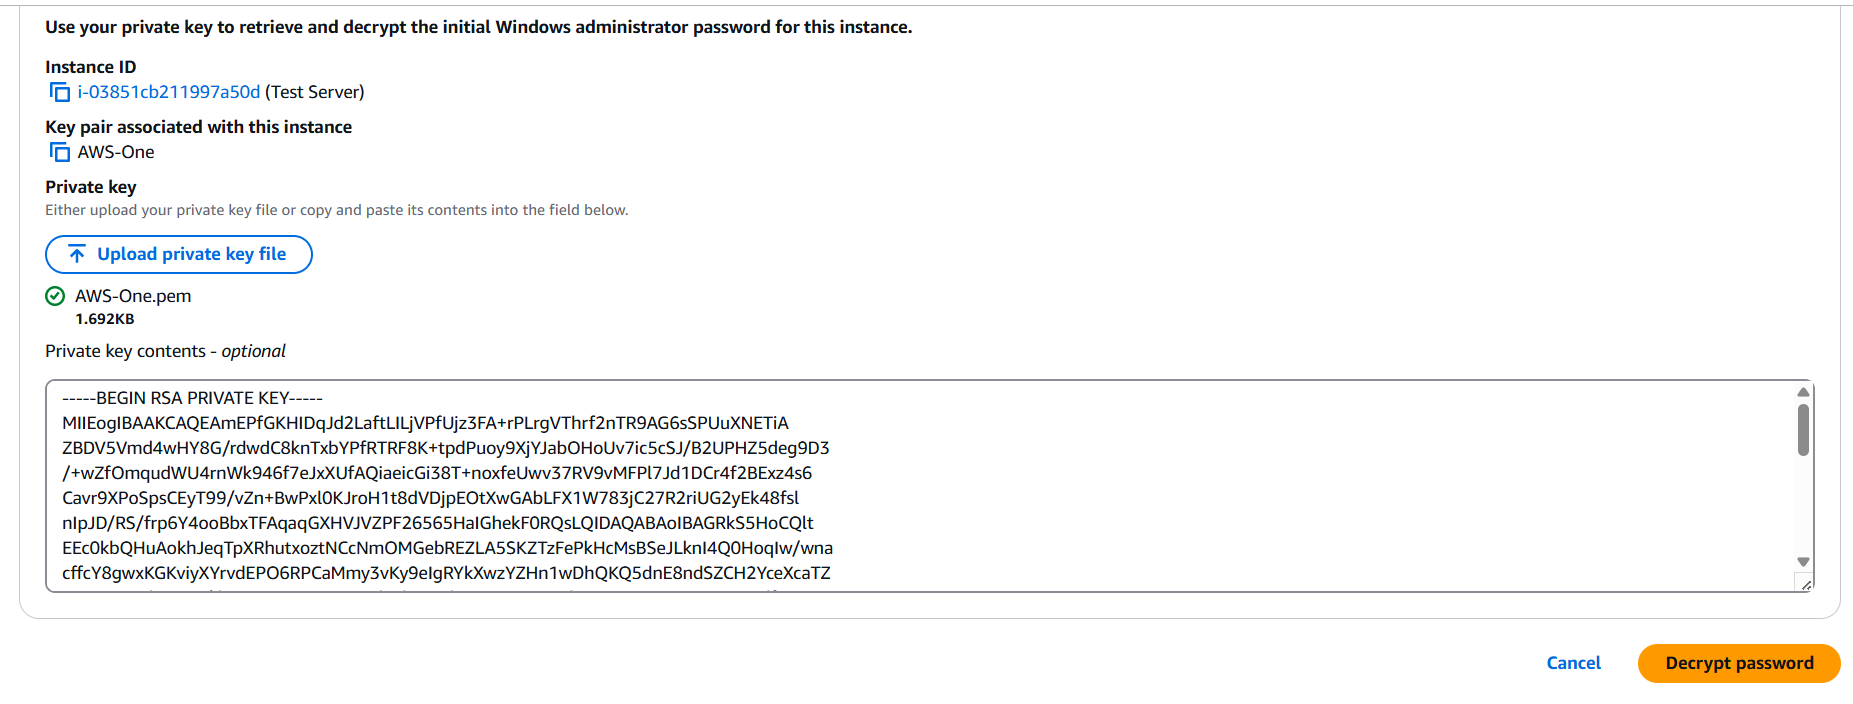
- Use the decrypted password to log into the server.
i. Configure Initial Server Settings
- Open Server Manager.
- Click Configure this local Server
- Set Time Zone to
UTC +5:30 (Chennai, Kolkata, etc.). - S3 and web server must have same application zone
Need to take care while next server creation - Disable IE Enhanced Security Configuration for Administrators.
2. Install Necessary Software
a. Install S3 Browser
- Download and install S3 Browser.
- Set up an S3 account using the Access Key and Password.
b. Install IIS Manager
- Open Server Manager.
- Click Add Roles and Features.
- Click Next, select all default options and choose Web Server (IIS) in server Roles.
- Install IIS Manager.
3. Install .NET 9 SDK
a. Download & Install .NET 9 SDK
- Visit .NET 9 SDK Download.
- Download and install the Hosting Bundle.
- Restart the server after installation.
4. Set Up ERP Crystal Web App
a. Install Git for Windows
- Download Git for Windows.
- Choose Notepad as the default editor.
- Use Windows’ default console for terminal configuration.
b. Pull Source Code from Repository
- Provide CodeCommit Credentials.
- Pull the Main Branch of the application.
- Configure
deploy.batto emit compiled code to the website folder. - Stop the running website before deploying.
c. Build & Deploy Application
- Stop the Test Server and change the Instance Type to
t3.large (8GB). - Restart the server.
- Update Target Framework to
.NET 9in.csproj(for Web/API). - Run
deploy.batfrom the command line. (Modify the deploy command by commenting out Git commands and updating the deploy path toC:\mfg.) - Change Instance Type back to
t3.small.
d. Configure IIS
Open IIS Manager.
Navigate to Sites.
Right-click and choose Add Website.
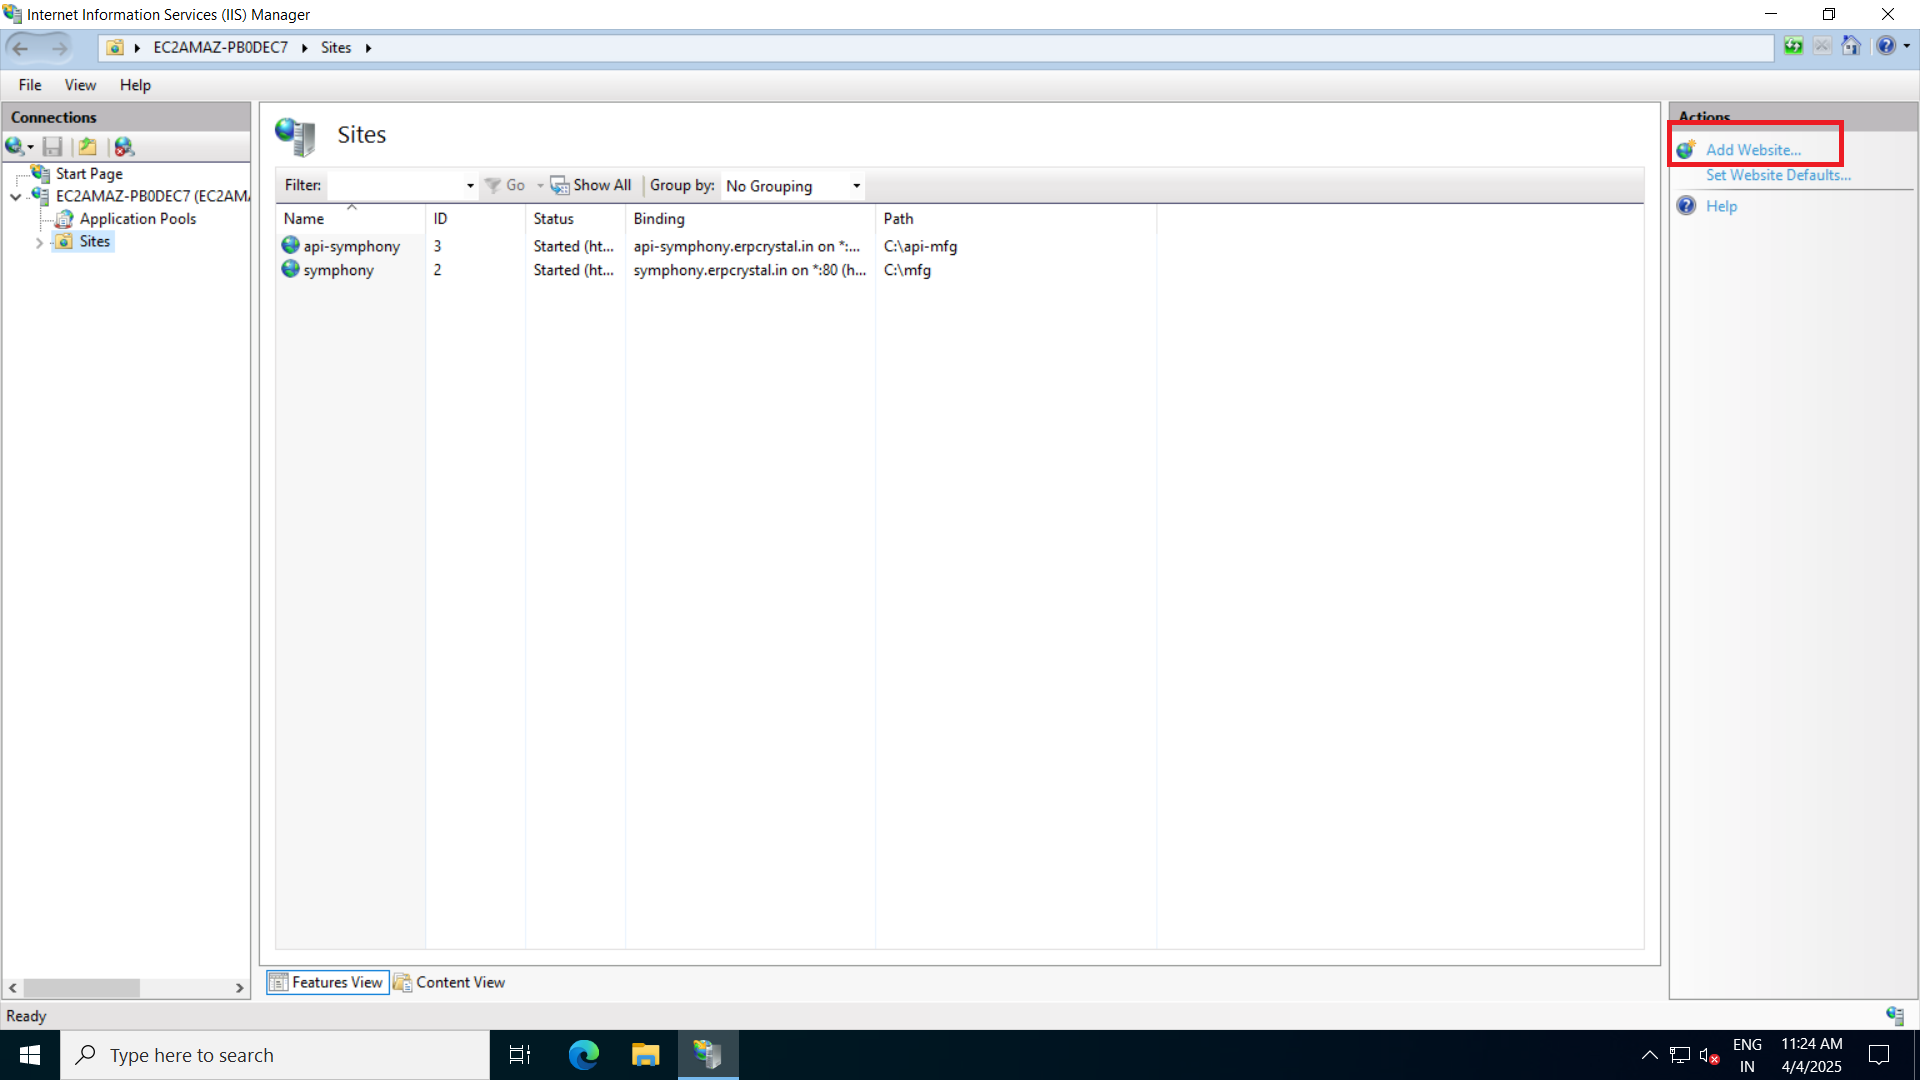
Enter Domain Name and specify the Website Folder.
Set Host Name (e.g.,
symphony.erpcrystal.in)Remove the Default Website.
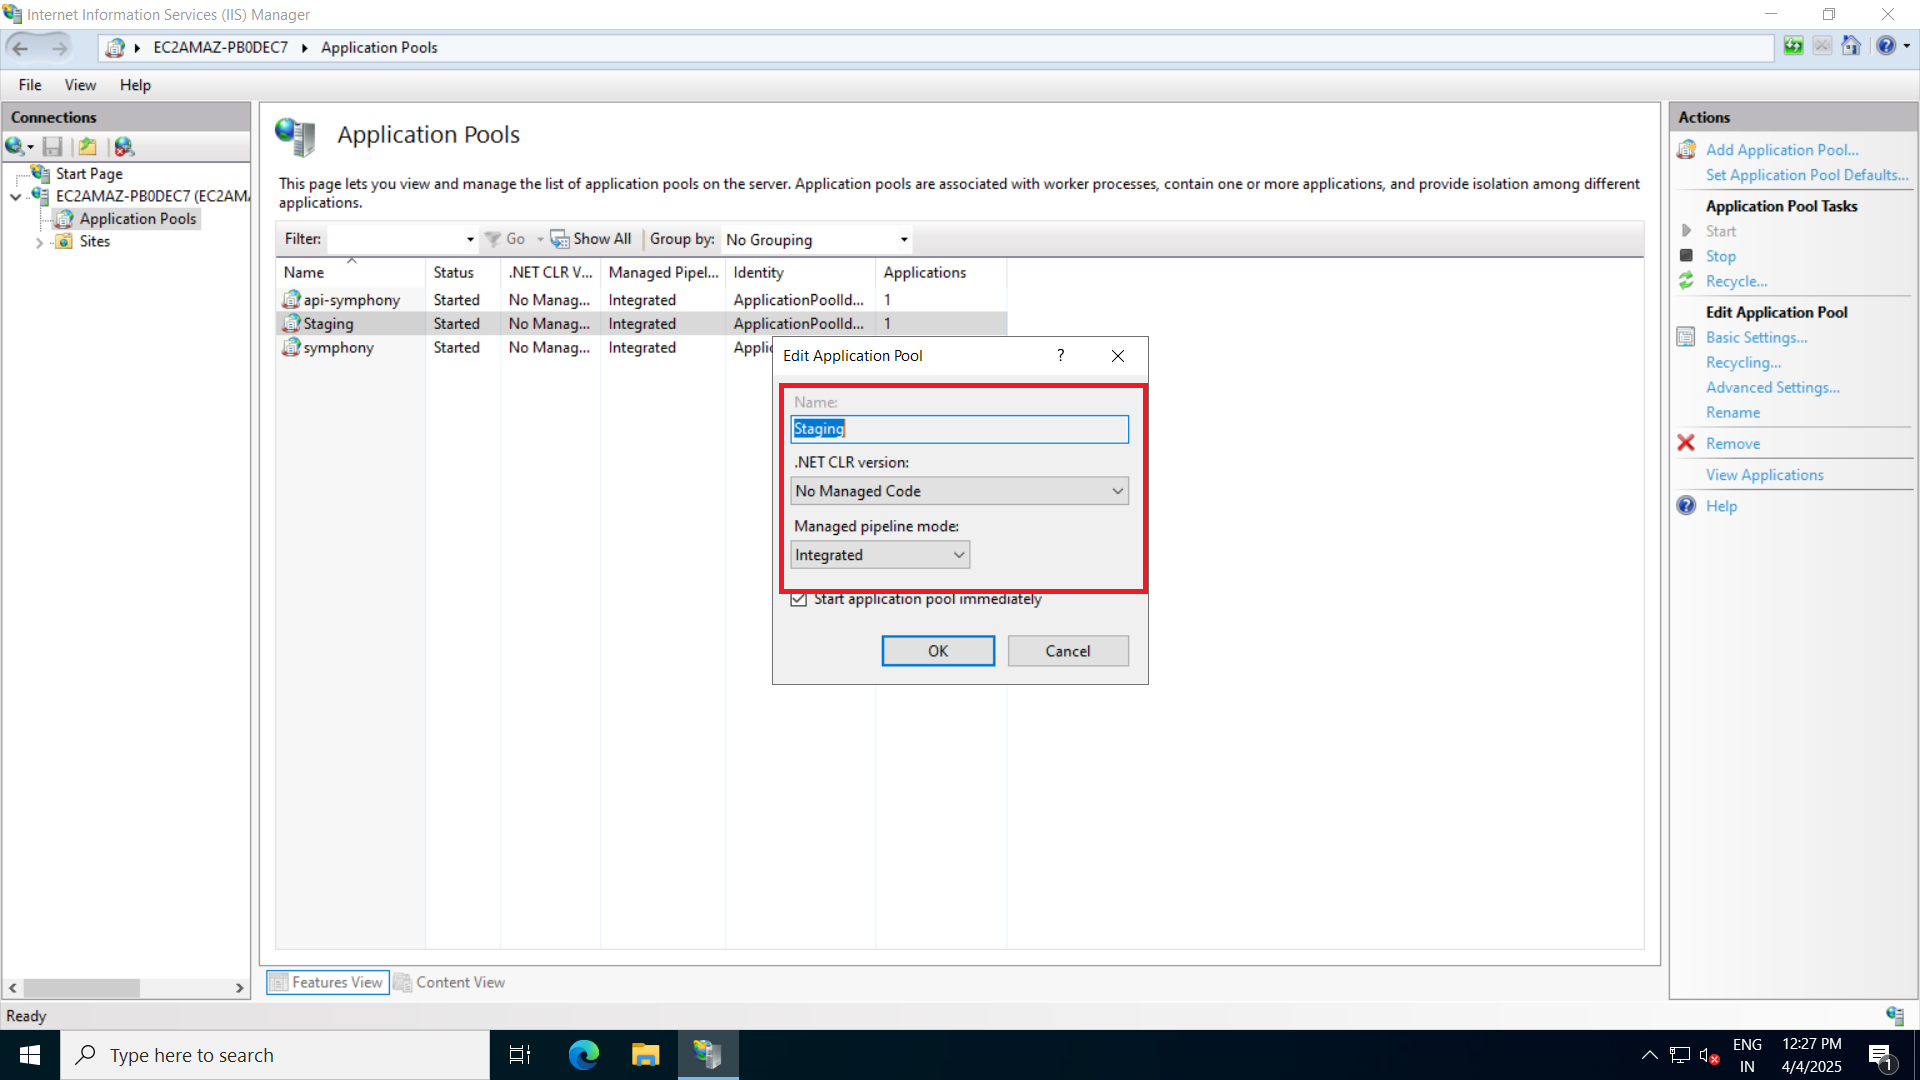
e. Configure Application Pools in IIS
- Edit Application Pool Settings:
- Select No Managed Code in Basic Settings.
- Enable Load Custom Profile in Advanced Settings of the application pool
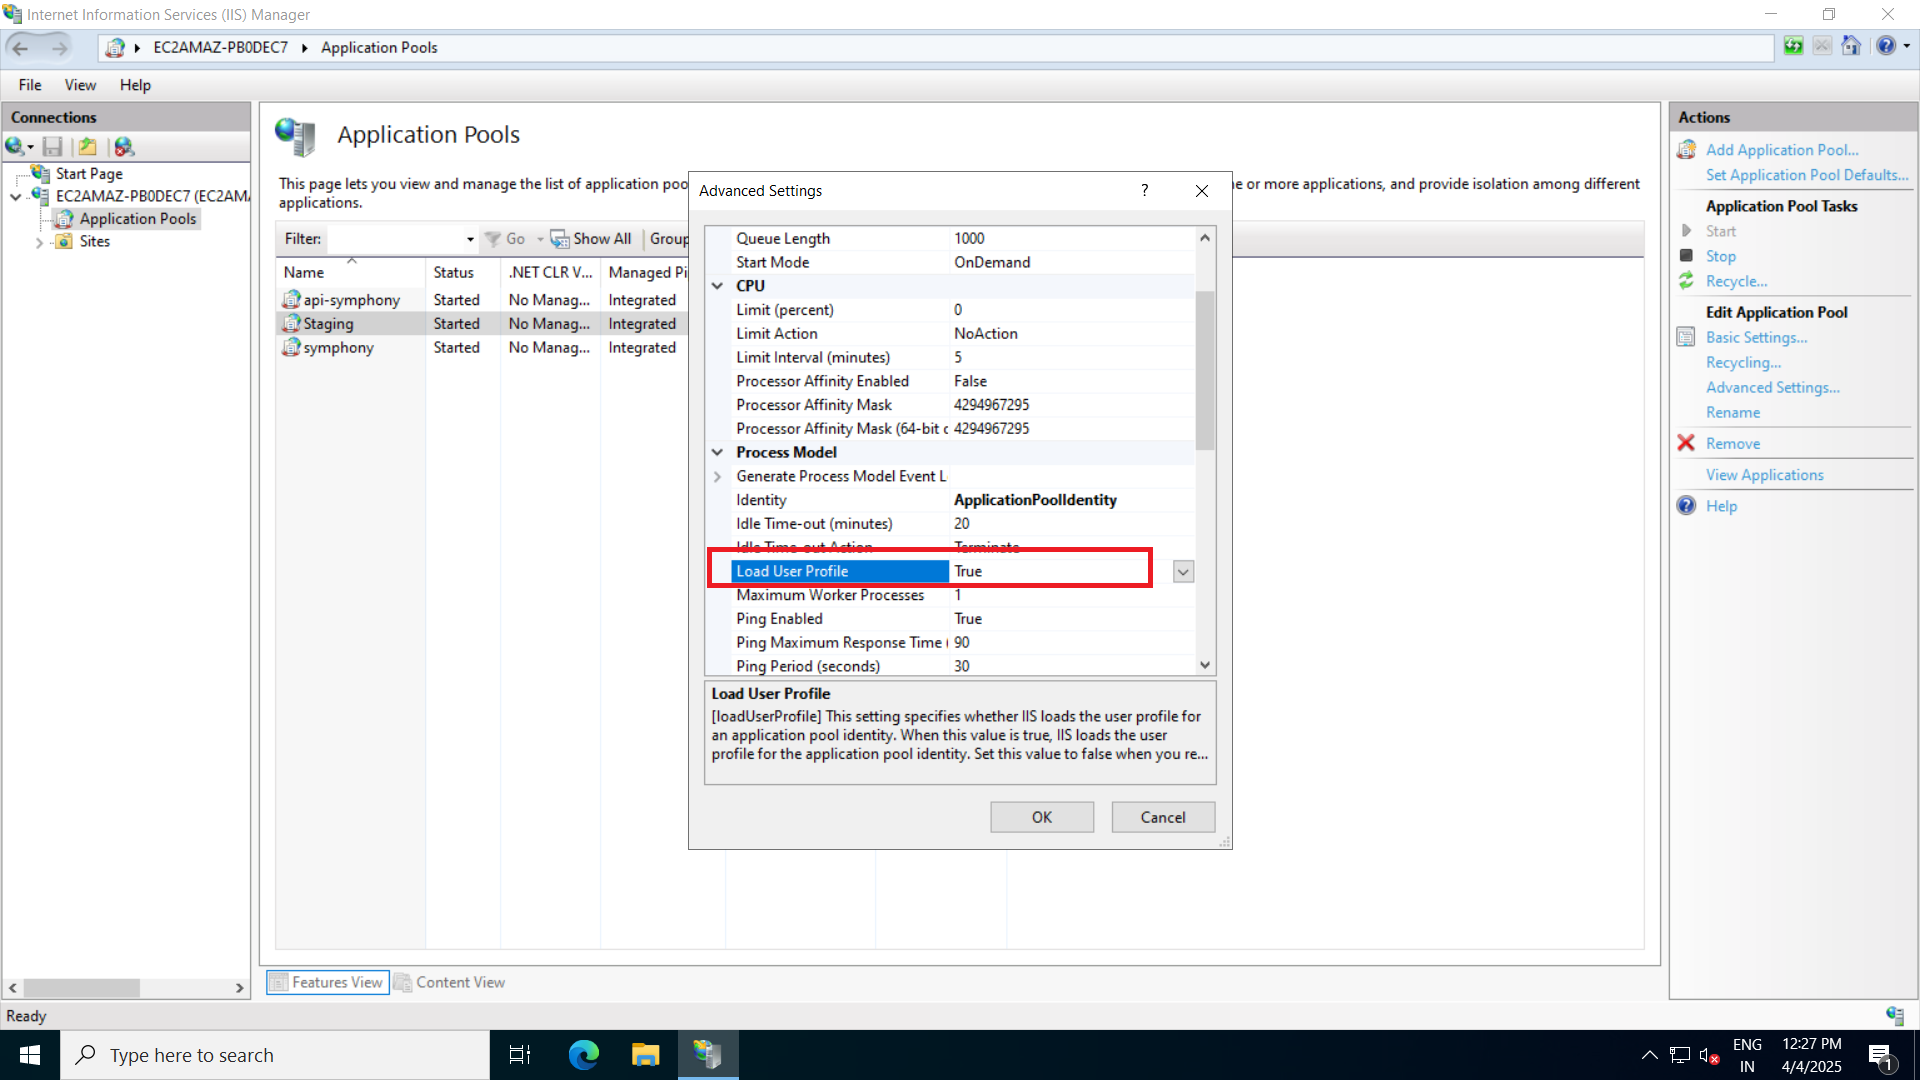
- Remove Default Website from the Application Pool.
- Select No Managed Code in Basic Settings.
5. Configure DNS & SSL
a. Configure DNS in Office 365
- Sign in to Office 365.
- Navigate to Admin Panel > Settings > Domains.
- Select the domain (
erpcrystal.in). - Click DNS Records.
- Modify A Records:
- One for the Website.
- One for the API Site.
b. Install SSL Certificate
- Go to AWS console,connect to the Instance.
- Modify Security Groups:
- Allow Inbound Traffic on Port 80. (Ensure IP address is
0.0.0.0/0.)
- Allow Inbound Traffic on Port 80. (Ensure IP address is
- Download Let’s Encrypt from S3 Browser to
C:\ Drive. - Open CMD as Administrator.
- Navigate to Let’s Encrypt folder.
- Run SSL Installation (
WACS). - Follow on-screen instructions.
- Remove Inbound Rule for Port 80 after installation.
c. Configure Return URL in Azure
- Visit Azure Portal.
- Log in to Tenant Account.
- Open App Registration.
- Add the Domain Name as a Return URL.
6. Final Setup & Testing
a. Configure appsettings.json
- Update Base URL.
- Set SQL Server Username & Password for Client and System Databases.
b. Enable Website Logging
- Navigate to the Website Folder.
- Create a Logs subfolder.
- Edit web.config:
- Locate
SDD out parameter. - Set value to
true.
- Locate
c. Test the Application
- Access the website from a local machine.
- Verify website functionality.